Connect AI tools
This guide walks you through connecting an AI tool to your Holistics workspace. Once connected, your AI tool can query data, explore dashboards, and run analytics — all from the interface you already use.
Before you start
Connecting any AI tool takes three steps. Steps 1 and 2 are the same for every tool — do them once, then jump to your specific tool below.
- Enable MCP in AI Settings
- Select your connection URL
- Connect your tool
Step 1: Enable MCP in AI Settings
This is a one-time setup done by a workspace admin. Go to AI Settings and enable both Holistics AI and the MCP Server.
If you don't have admin access, ask your workspace admin to do this.
Step 2: Select your connection URL
Your connection URL depends on your data center region and the Holistics environment you want your AI to work with.
App domain
Environment
Connection URL
https://mcp-apac.holistics.io/reporting/mcp
Connection URL
https://mcp-apac.holistics.io/development/mcp
Environment
Connection URL
https://mcp-us.holistics.io/reporting/mcp
Connection URL
https://mcp-us.holistics.io/development/mcp
Environment
Connection URL
https://mcp-eu.holistics.io/reporting/mcp
Connection URL
https://mcp-eu.holistics.io/development/mcp
Connection URL
Please contact [email protected] for your MCP server address.
URL format
https://mcp-<REGION>.holistics.io/<ENV>/mcp
<REGION>: Choose based on your data center:apac,eu, orus<ENV>:reporting(default): Let your AI work with published Holistics objects (i.e. objects on your Holistics Reporting tab)development: Let your AI work with unpublished Holistics objects in your current AMQL project branch (i.e. objects on your Holistics Development tab)
Claude.ai
Claude.ai connects via OAuth — no API key needed.
-
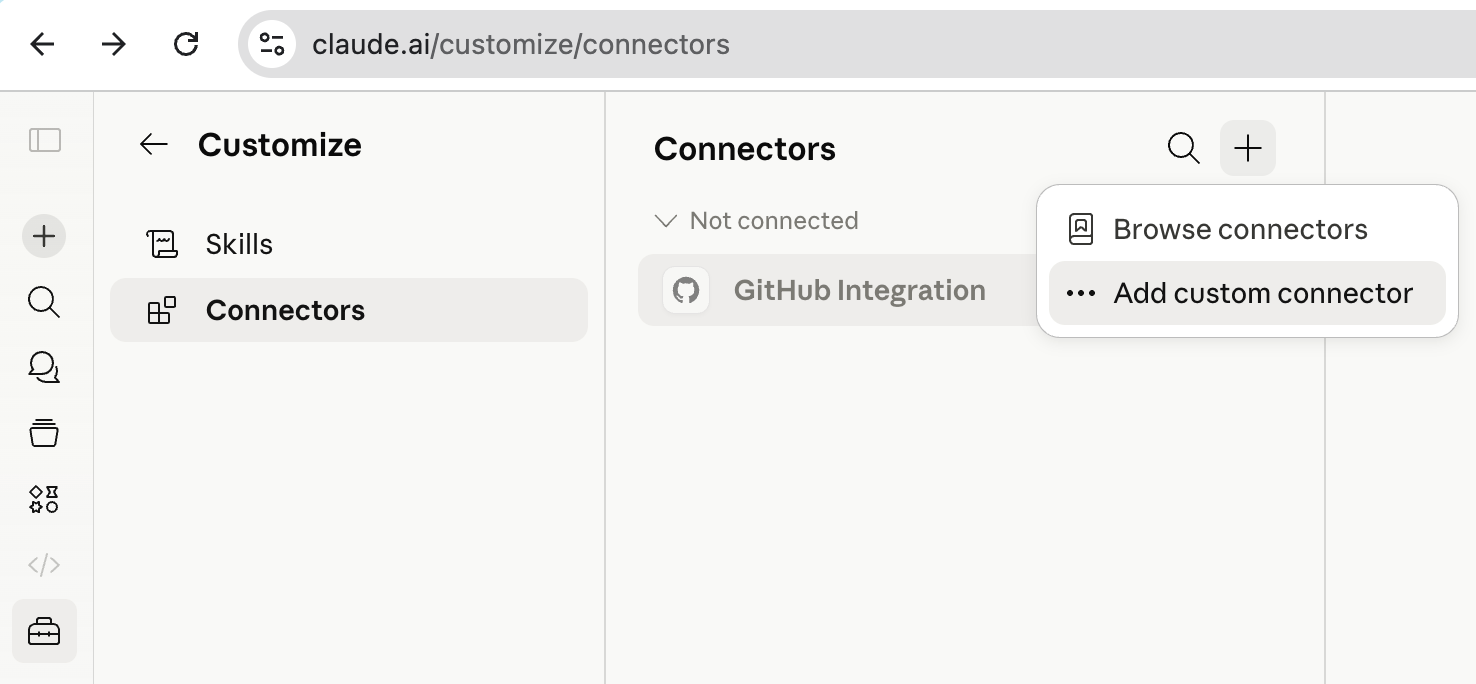
Choose Add custom connector.
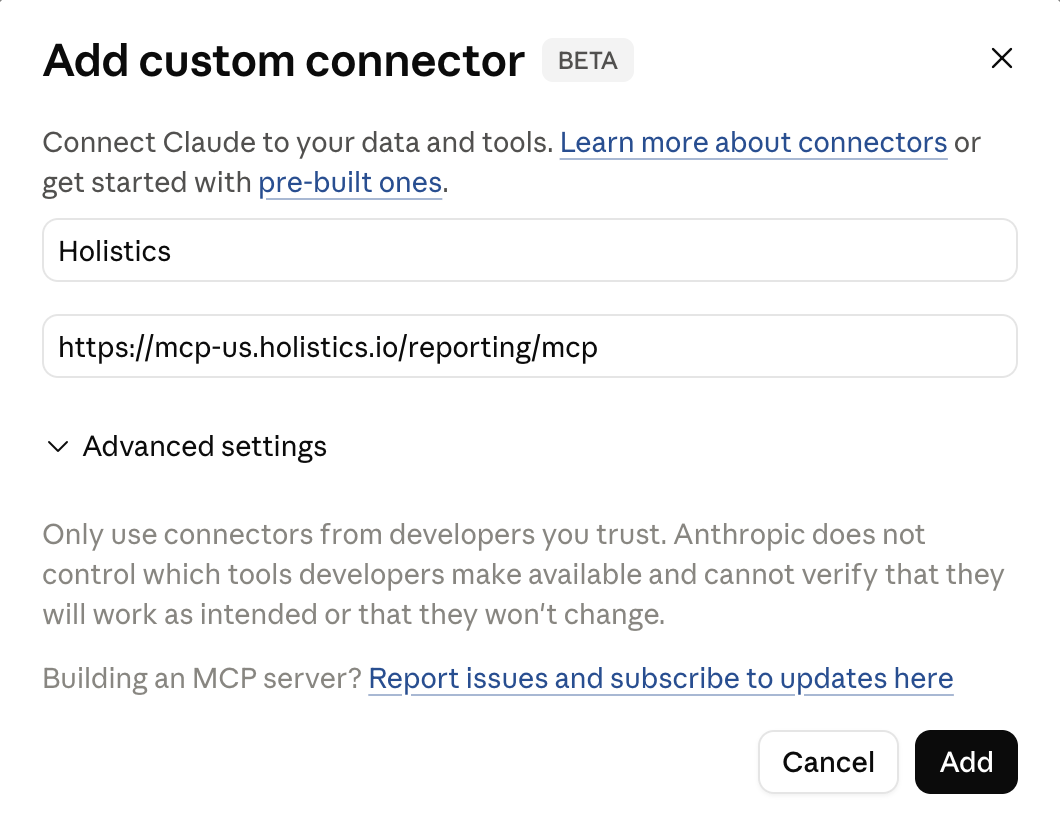
-
Enter a name and your connection URL obtained from Step 2, then click Add.
-
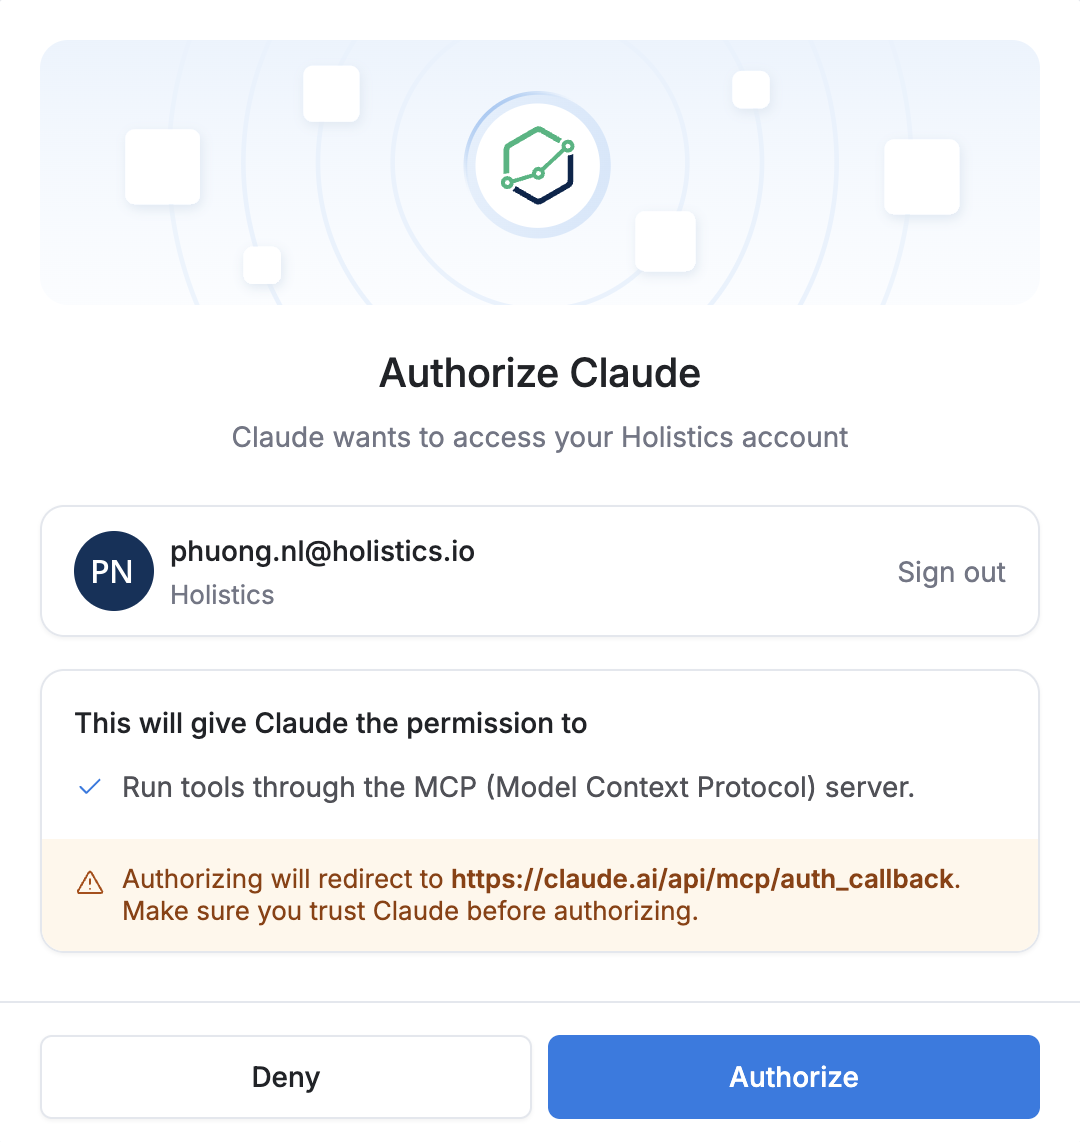
Click Connect and follow the OAuth flow to authenticate with your Holistics account.
-
To use it in a chat, make sure Holistics under Connectors is enabled.
Claude Code
Claude Code supports both a CLI command and a JSON config.
Option 1 — CLI command (quickest):
# With OAuth
claude mcp add holistics-<ENV> <MCP_SERVER_ADDRESS> --transport http
# With API Key
claude mcp add holistics-<ENV> <MCP_SERVER_ADDRESS> --transport http --header "X-Holistics-Key:<YOUR_HOLISTICS_API_KEY>"
Option 2 — JSON config — add to your Claude Code MCP config:
{
"mcpServers": {
"holistics": {
"url": "<MCP_SERVER_ADDRESS>",
"headers": {
"X-Holistics-Key": "<YOUR_HOLISTICS_API_KEY>"
}
}
}
}
For OAuth, omit the headers field — the client handles authentication automatically.
Note: No spaces between X-Holistics-Key: and your API key.
Claude Desktop
Claude Desktop uses a local command config.
-
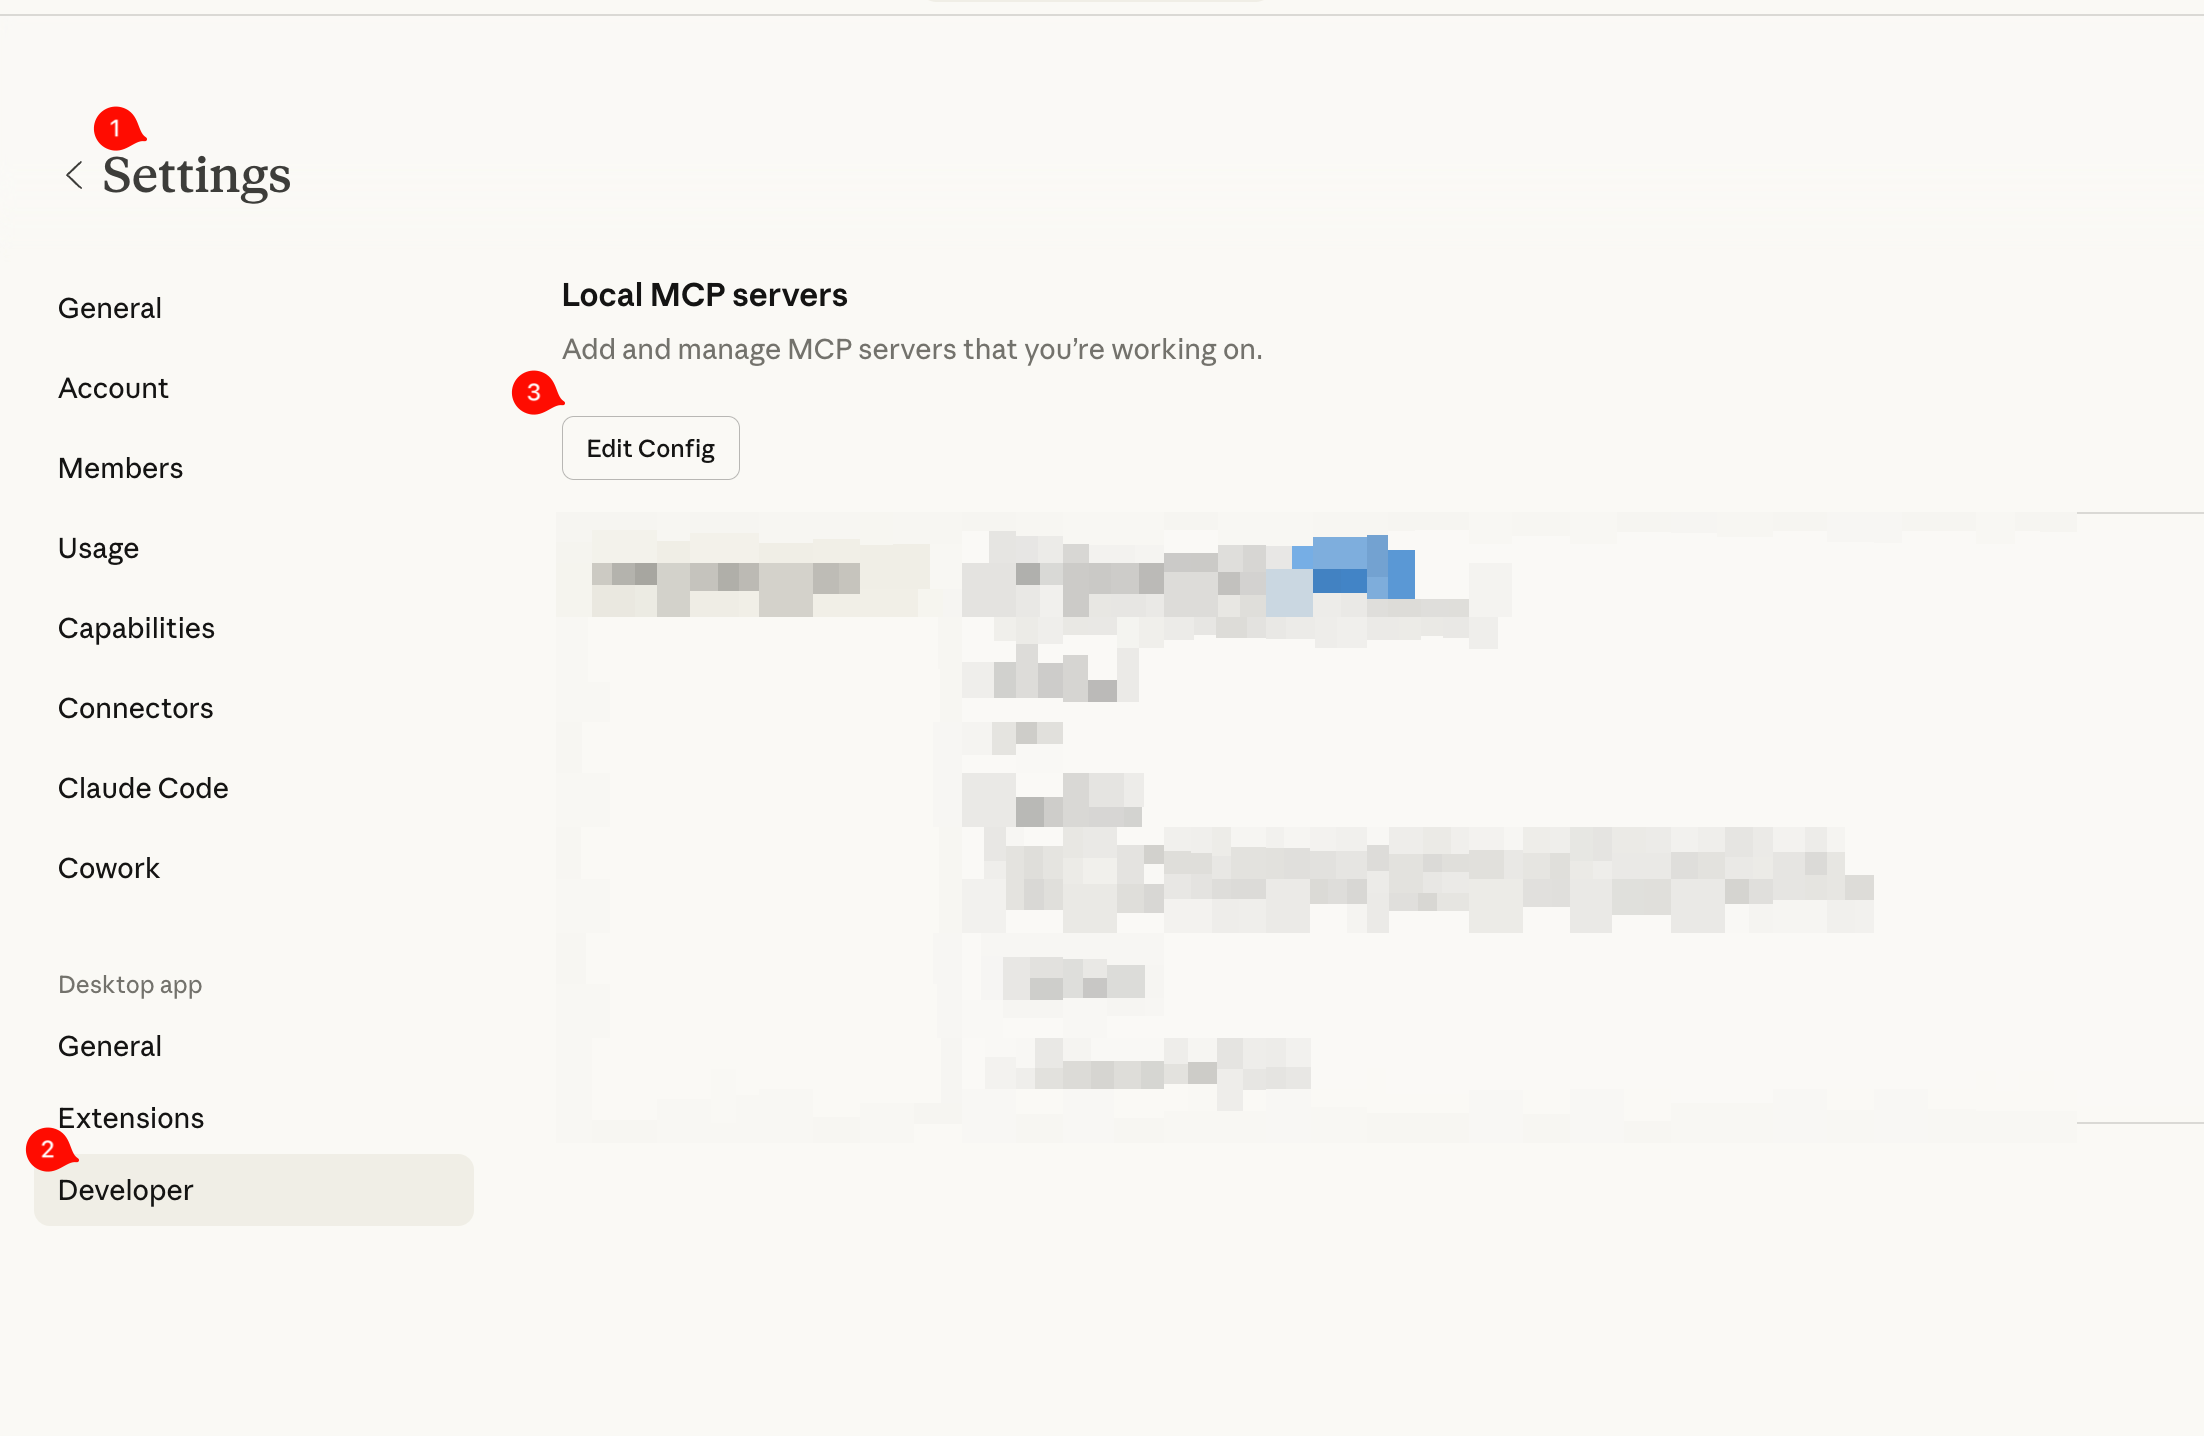
Go to Settings > Developer > Edit Config.
-
Add Holistics to your config:
{"mcpServers": {"holistics": {"command": "npx","args": ["-y","mcp-remote","<MCP_SERVER_ADDRESS>"]}}}For API Key auth, add
"--header", "X-Holistics-Key:<YOUR_HOLISTICS_API_KEY>"to theargsarray. -
Save and restart Claude Desktop.
Cursor
Cursor supports both remote URL and local command configs. See Cursor MCP docs for where to place them.
Remote URL config:
{
"mcpServers": {
"holistics": {
"url": "<MCP_SERVER_ADDRESS>",
"headers": {
"X-Holistics-Key": "<YOUR_HOLISTICS_API_KEY>"
}
}
}
}
Local command config:
{
"mcpServers": {
"holistics": {
"command": "npx",
"args": [
"-y",
"mcp-remote",
"<MCP_SERVER_ADDRESS>",
"--header", "X-Holistics-Key:<YOUR_HOLISTICS_API_KEY>"
]
}
}
}
For OAuth, omit the headers / --header argument — the client handles authentication automatically.
ChatGPT
ChatGPT connects via OAuth — no API key needed.
-
Open Settings > Apps, then click Advanced settings at the bottom.
-
Toggle Developer mode on.
-
Click Create app. Enter a name, your connection URL, and select OAuth as the authentication method.
-
Click Save — the app appears under Drafts in Settings > Apps.
To use it in a chat, click + in the composer > More > Developer mode, then select your app.