Working with Pipedrive's custom fields
In A Complete Guide to Analyze Pipedrive data with Holistics for Free we have gone through the basics steps to work with Pipedrive data. However, things are more complicated when custom fields are involved.
In this guide we will walk you through the steps to handle Pipedrive's custom fields, assuming that you are:
- Familiar with how Import Models, Query Models and Datasets work.
- Familiar with SQL.
- Comfortable with viewing source HTML of webpages (optional).
The problem with Pipedrive's custom field
For each entity (deals, organization, persons...) Pipedrive comes with some default data fields that are enough for basic use cases. These default fields are automatically recognized by Holistics and can be imported in a straightforward way.
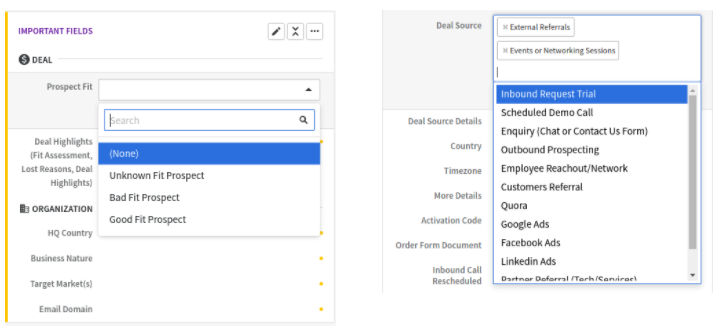
Things get a little bit hairy when you have custom fields in Pipedrive to serve your specific needs, for example a "Prospect Classification" field where you define if the lead is good or bad, or a "Deal Sources" field to note all the channels that you used to connect with your customers.
These fields are not automatically recognized, and the fields' values come in raw form that does not resemble what you see in Pipedrive.
How to import custom fields
When creating Import Model from a Pipedrive's table, open Sync Configuration section and scroll through the whole list of default fields to see Add New Column option:
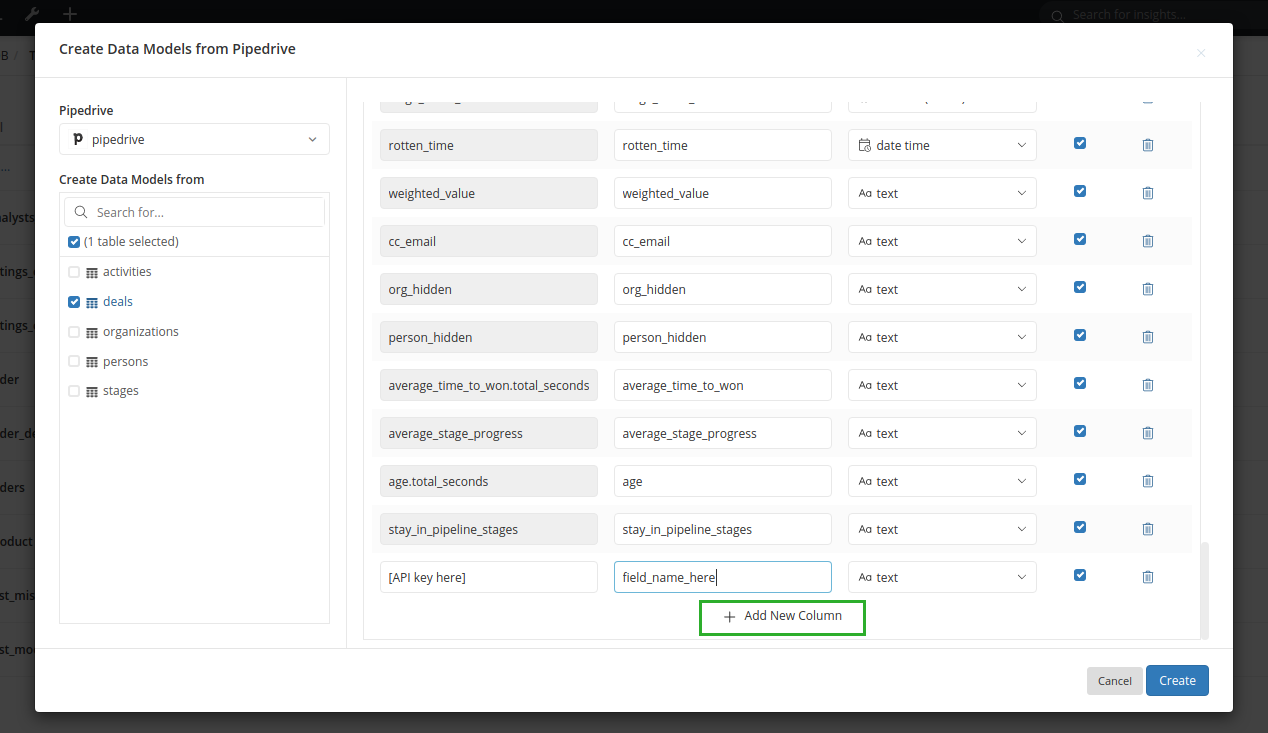
Click on the button and a new blank field will appear. From here you can input the custom field's API key and a user-friendly field name to be used in the model.
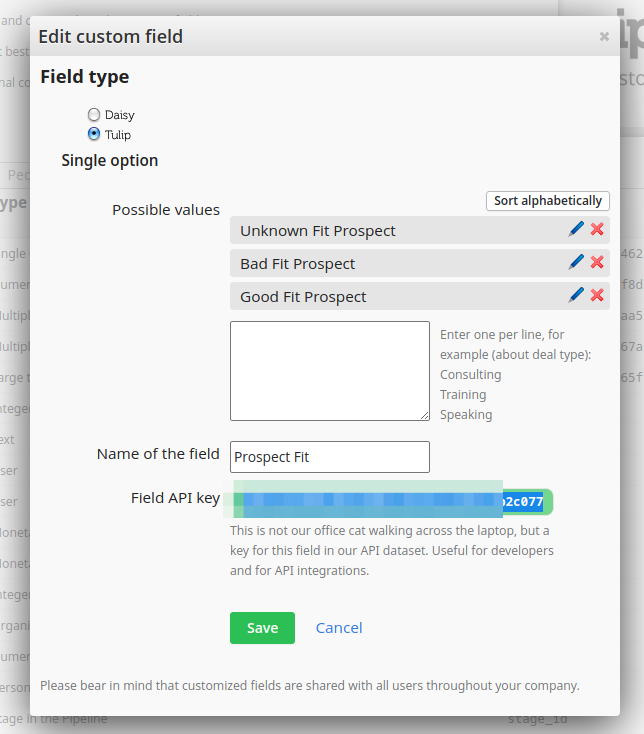
To have the API key of the field, you need to log in your Pipedrive account and navigate to Setting > Custom fields section. You will see the default fields are in black, while the custom fields are in blue and have API key that looks like the product of an office cat walked through a keyboard:
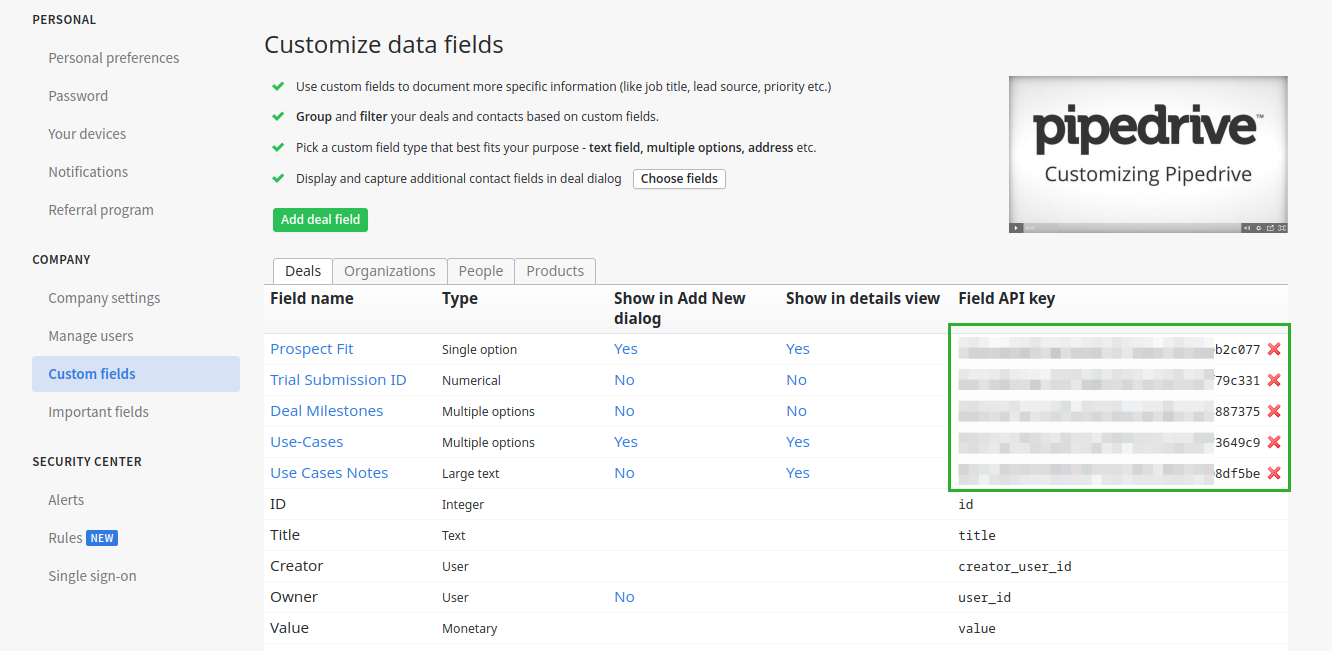
Click on the field's name and copy its API key to the Source Column field in Holistics's import screen, then name it however you like. In this example, we name the new field prospect_fit_tag. and set the field's data type as Text.
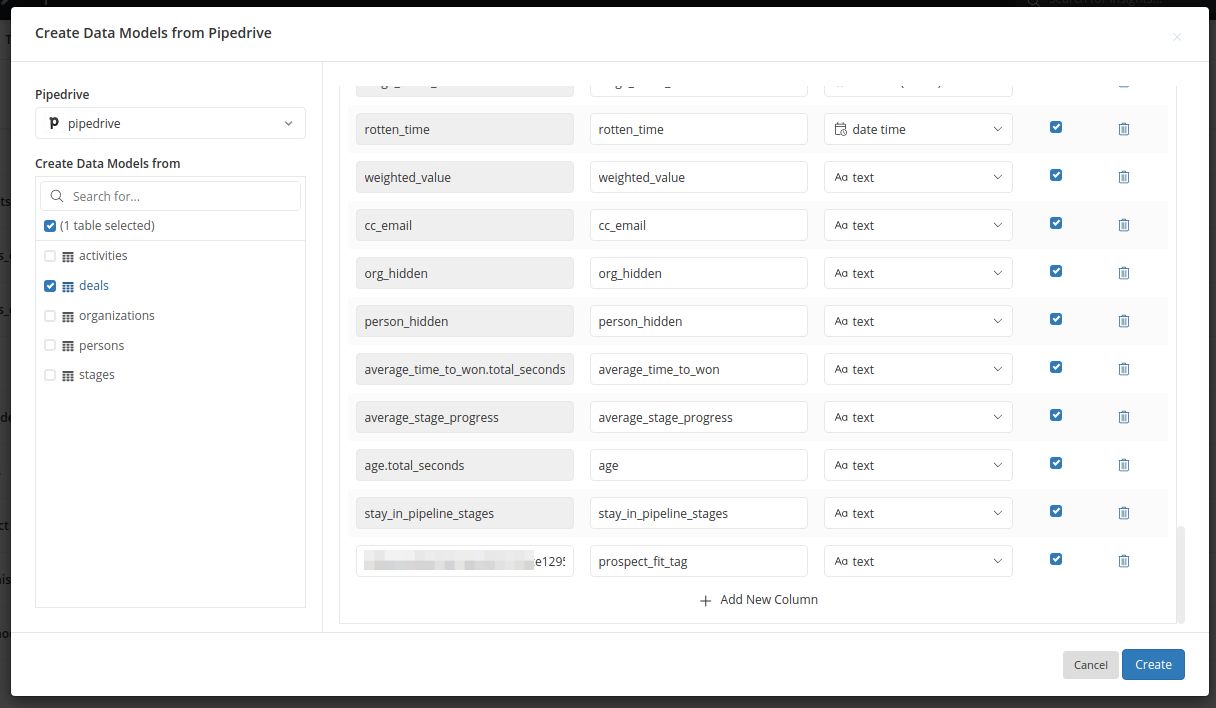
By default, custom fields from Pipedrive will be imported as Text. Click Create to start importing as usual.
If your custom field is of numeric, text, date... type then your data will appear as it is.
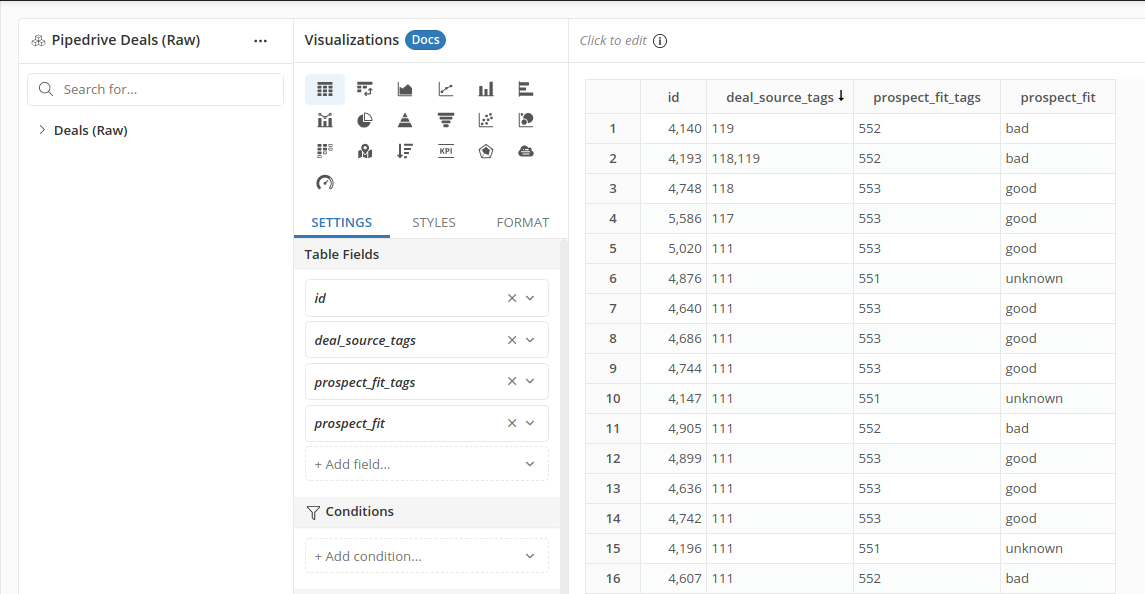
However, the work is just half-done if your custom field is single-option or multiple-option type. The field's options are presented as a string of numbers:
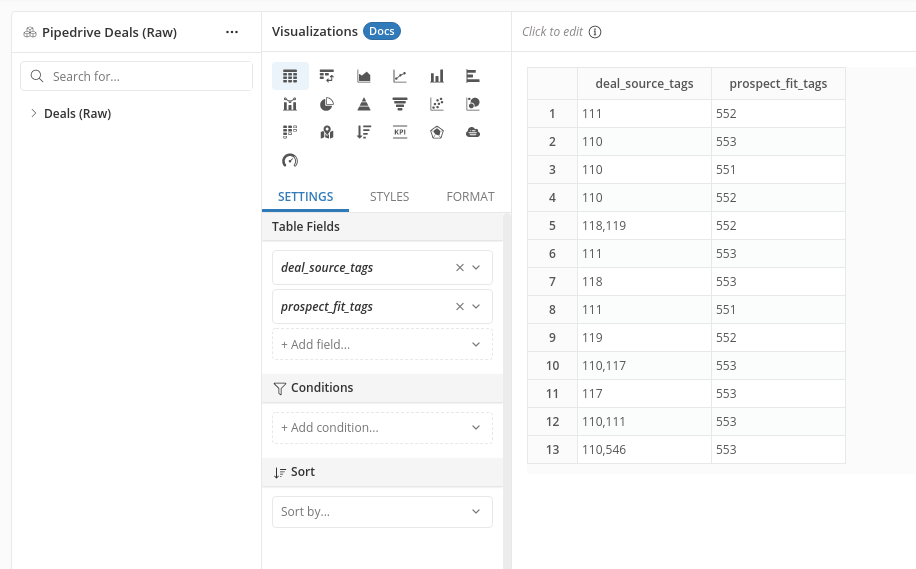
For example, In the prospect_fit_tags column, instead of seeing verbose labels like "Good Fit", "Bad Fit"..., what you see are the options' IDs.
Next we will look at how to translate these IDs into user-friendly textual values.
Find out the text labels of option IDs
When importing custom single-option and multiple-option fields, Pipedrive does not automatically return the verbose field values as you see in your user interface. Instead, they return the IDs of those values.
We have to find out ourselves which value each ID corresponds to by inspecting the webpage elements itself with the browser's developer tool.
Head back to Custom field screen and click on the field that you want to examine. Right-click on one of the field's options, then select Inspect (if you use Chrome) or Inspect Element (if you use Firefox).

The inspection panel will open up, with the element for the option highlighted. As you can see in this example, there are three <li> elements corresponding to the three options on the web page.
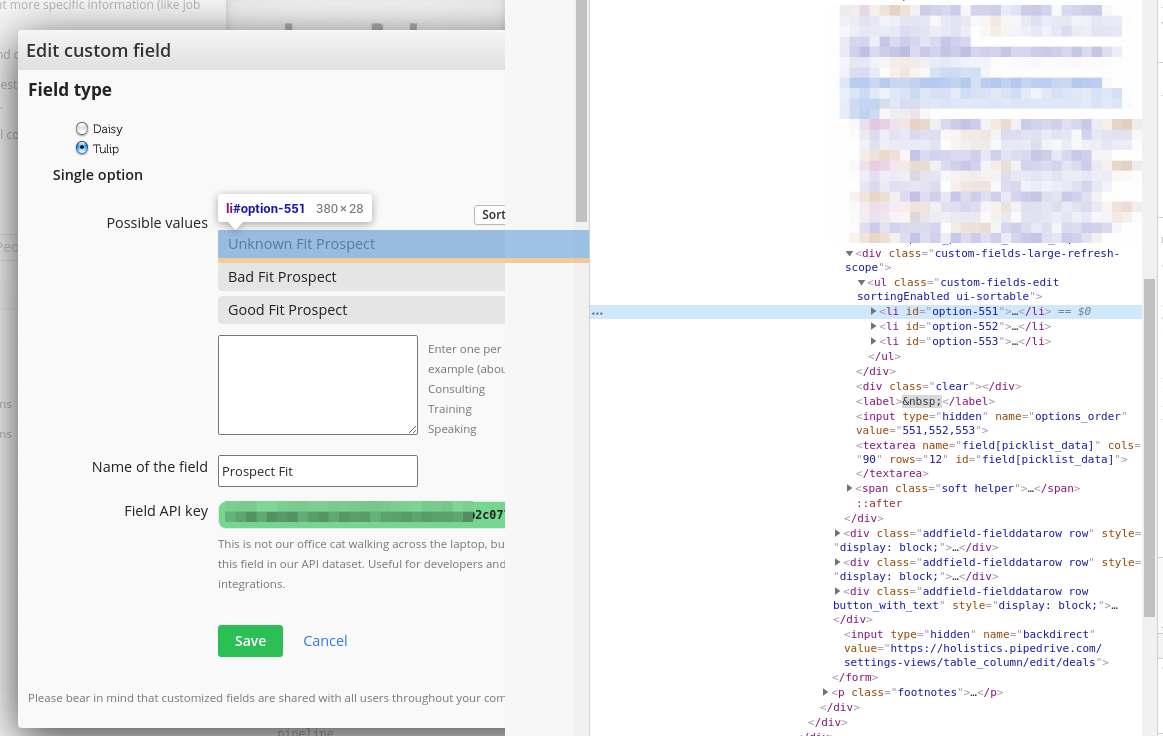
In this example, you can see that ID 552 corresponds to "Bad Fit", ID 553 corresponds to "Good Fit" and so on.
We admit that this step may look intimidating if you are not familiar with HTML, but we have not found a faster way to do it. If you happen to know a more user-friendly way to do this, please let us know!
Handle single-option custom fields
Now that we know the textual value of those option IDs, we can now create a calculated field in the Pipedrive model to do translation.
Head back to Holistics, navigate to your Pipedrive Deals model, create a Calculated Field and use the CASE... WHEN... clause to translate the IDs to more verbose values.

In the case of a single-option field like Prospect Fit, each deal corresponds to only one prospect fit value so CASE... WHEN... should work.
However, in the case of multiple-option fields like Deal Source, you need other tricks.
Handle multiple-option custom fields
In the case of Deal Source field, each deal can have multiple values. How will you answer questions like "how many deals are there from different sources?"
In other words, this is a typical problem with "nested fields".

To properly handle it, you need to "unnest" this field so that each row only contains one value. It means that if the deal has two values, there should be two rows for that field, and so on.
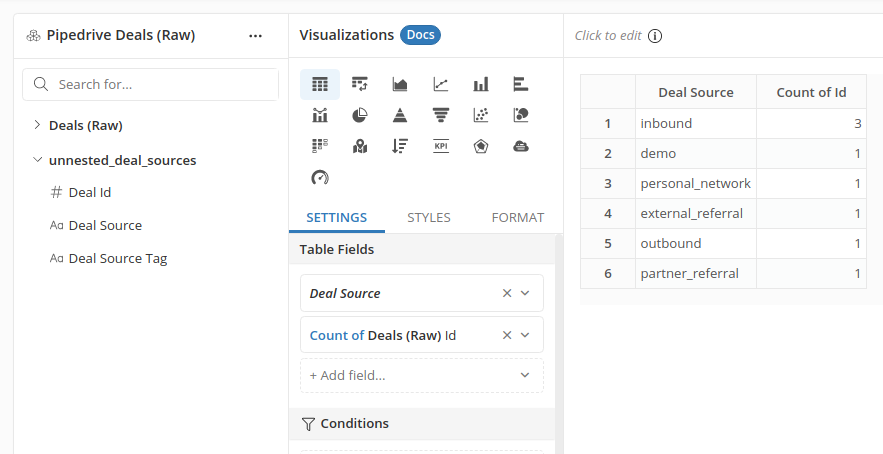
Head back to the Data Modeling page. Now we need to write a SQL transformation that does the nesting. You can see in the result now each deal has two rows corresponding to two different deal source values:
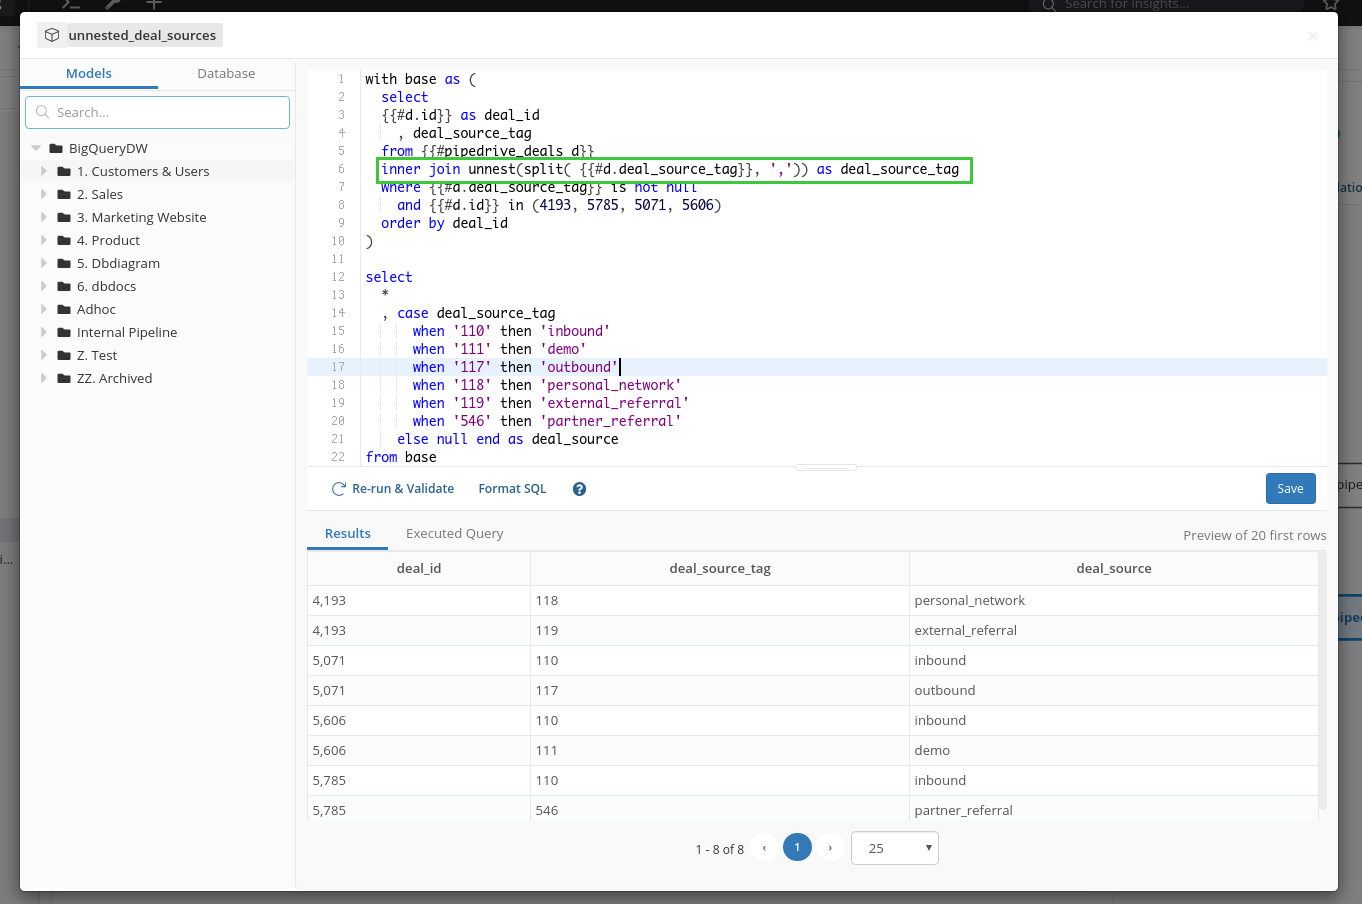
In this example, we are using BigQuery. The exact query will be different in other SQL flavors like PostgreSQL, but the logic remains the same.
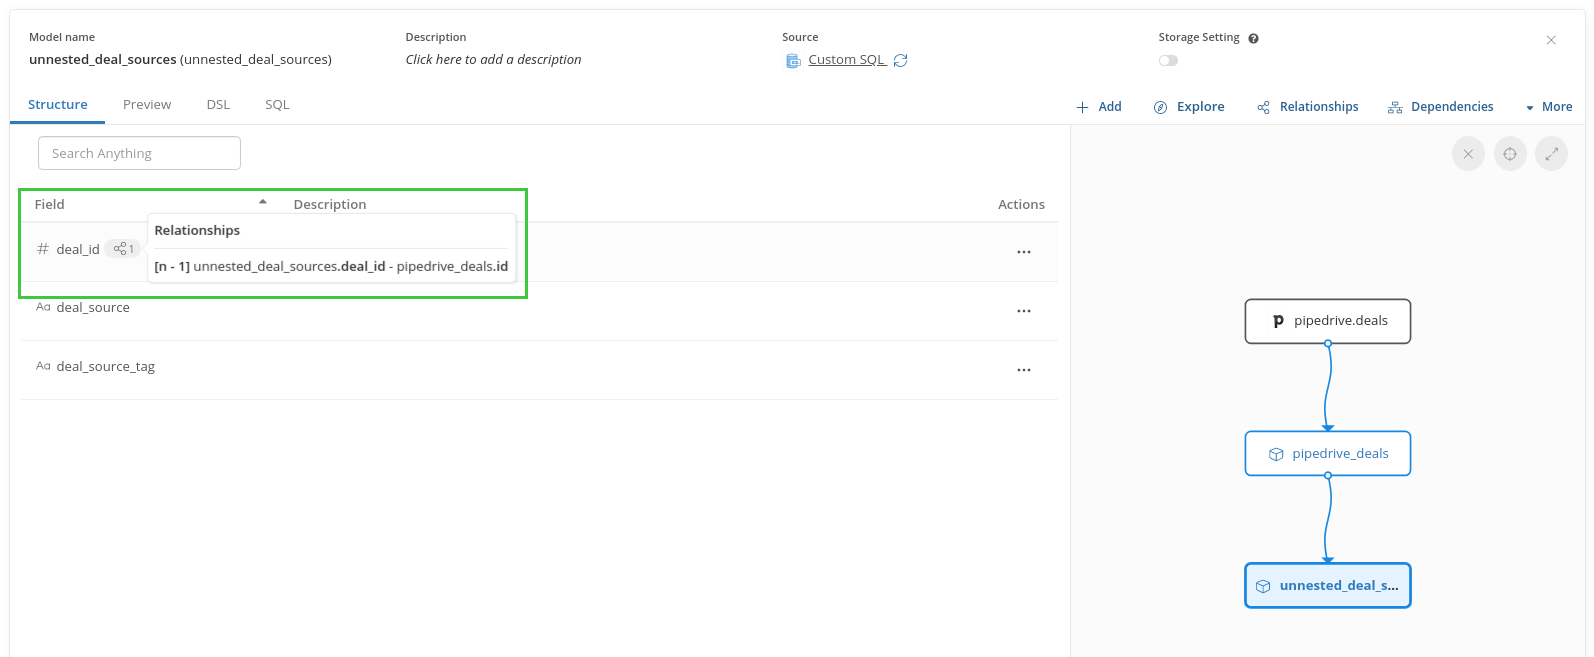
Click Save, and now you have a new Query Model (let's name it unnested_deal_sources). Next, set up an n - 1 relationship between this model and the original pipedrive_deals model to use it in the exploration dataset.
Go back to your Deals dataset, add the newly created model to your dataset and drag in the unnested field from this model.
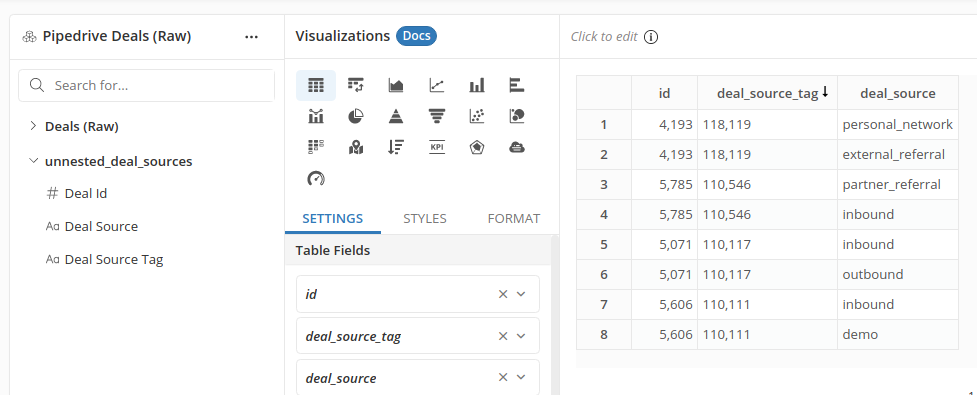
Finally you can count the number of deals coming from each source. In this example, we have four deals but three of them came from inbound trial requests: