Quickstart
In this guide, you'll embed a live Holistics dashboard into your web app using Single Dashboard embedding (the fastest way to get started). Not sure which approach fits your use case? See Two approaches to embedding.
Prerequisites
Before you begin, make sure you have:
- A Holistics account with at least one dashboard built
- A web app to embed into (any stack: Rails, Express, Django, etc.)
Enable Embedded Analytics
By default, Embedded Analytics is not enabled. To turn it on, go to Tools → Embedded Analytics and enable the features you need:
- Basic features: Single Dashboard embedding for quick, targeted dashboard integration
- Advanced features: Embed Portal for full self-service analytics capabilities
Each feature can be set to Off, Trial, or On. Enable Trial mode to try things out without worrying about cost changes. You can also configure the number of embed workers to handle your embedded content load.
Embed a single dashboard
The whole flow boils down to three steps: get your credentials from the Holistics UI, generate a signed token on your backend, and drop an iframe into your frontend.
Step 1: Generate an embed link
- Open the dashboard you want to embed
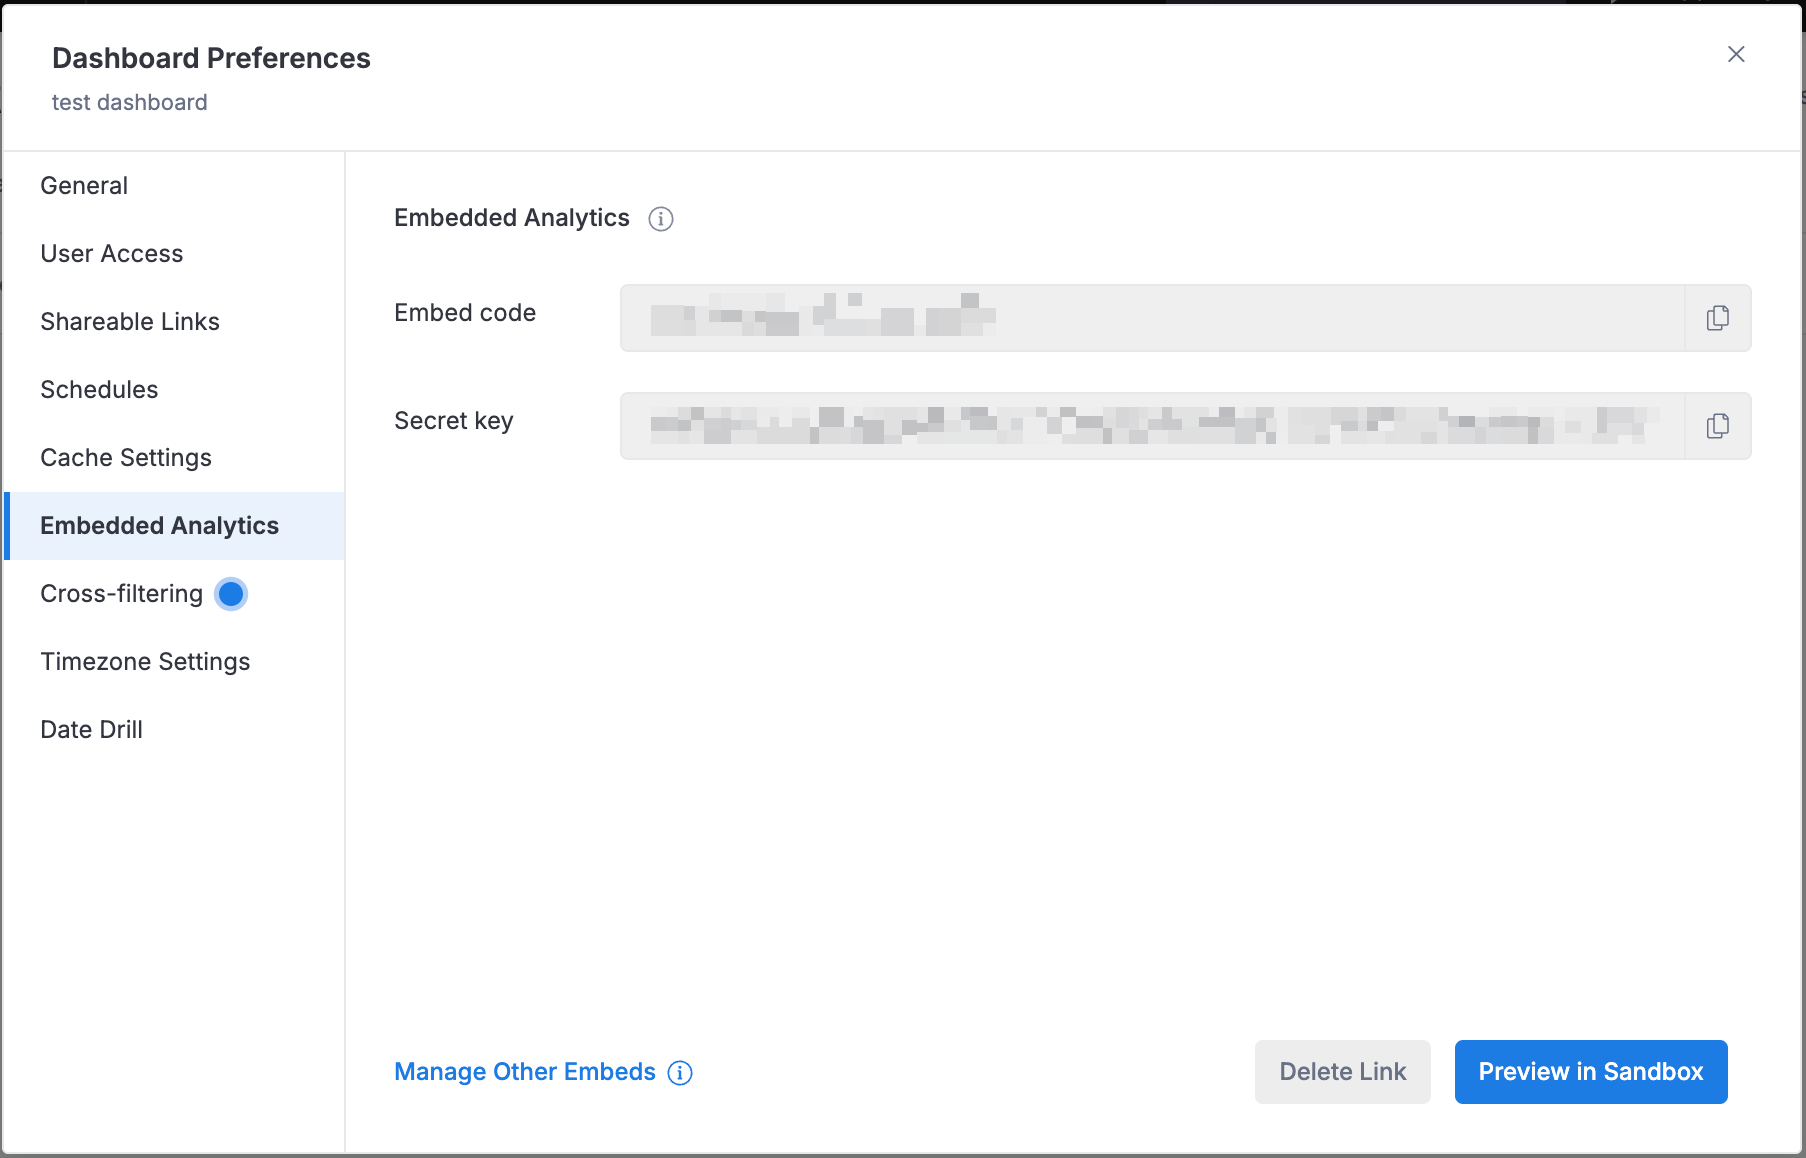
- Go to Settings → Dashboard Preferences → Embedded Analytics
- Click Generate Embed Link
You'll get two values:
- Embed Code: identifies which dashboard to show
- Secret Key: used to sign the embed token (keep this safe on your backend!)
Step 2: Generate a token (backend)
On your server, build a JWT payload with basic settings and sign it with your secret key. Here's a minimal example: no permissions or filters, just enough to get the dashboard on screen.
- JavaScript
- Python
- Ruby
const jwt = require('jsonwebtoken');

const embedCode = '275XXXXXXXXX';   // from Step 1
const secretKey = '382fXXXXXXXX';   // from Step 1

const payload = {
  settings: {
    enable_export_data: false,
  },
  permissions: {
    row_based: [],
  },
  filters: {},
  exp: Math.floor(Date.now() / 1000) + 24 * 60 * 60,  // expires in 24 hours
};

const token = jwt.sign(payload, secretKey, { algorithm: 'HS256' });
import jwt
import time

embed_code = '275XXXXXXXXX'   # from Step 1
secret_key = '382fXXXXXXXX'   # from Step 1

payload = {
    'settings': {
        'enable_export_data': False,
    },
    'permissions': {
        'row_based': [],
    },
    'filters': {},
    'exp': int(time.time()) + 24 * 60 * 60,  # expires in 24 hours
}

token = jwt.encode(payload, secret_key, algorithm='HS256')
require 'jwt'

embed_code = '275XXXXXXXXX'   # from Step 1
secret_key = '382fXXXXXXXX'   # from Step 1

payload = {
  settings: {
    enable_export_data: false,
  },
  permissions: {
    row_based: [],
  },
  filters: {},
  exp: Time.now.to_i + 24 * 60 * 60,  # expires in 24 hours
}

token = JWT.encode(payload, secret_key, 'HS256')
Step 3: Add the iframe (frontend)
Drop this iframe into your HTML, substituting in the embed_code, token, and region domain from your backend:
<iframe
  src="https://{region_domain}.holistics.io/embed/EMBED_CODE?_token=TOKEN"
  style="width: 100%; height: 600px;"
  frameborder="0"
  allowfullscreen>
</iframe>
Replace {region_domain} with secure, us, or eu. If you use a custom domain, replace the full {region_domain}.holistics.io host with your custom domain.
That's it! You should see your dashboard rendered inside your app.
Once it's working, you can fine-tune things like permissions, filters, and appearance:
- Basic Settings: control export, timezone, header visibility, and filter defaults
- Permission Settings: restrict data access per user with row-level permissions
- Drill-Through: let users click into related dashboards
Ready for more? Try Embed Portal
Single Dashboard embedding is great for targeted, read-only views. But when you need multi-dashboard navigation, self-service exploration, or multi-tenant workspaces, Embed Portal gives your users a full analytics experience inside your app.
Here's what the setup looks like at a high level:
Step 1: Enable Git flow
Embed Portal uses an as-code workflow, so you'll need Git integration enabled. Follow the Version Control with Git guide to set that up.
Step 2: Define your portal
Create a .embed.aml file in your Development tab that lists the dashboards and datasets you want to expose:
EmbedPortal my_portal {
  objects: [
    sales_overview,    // dashboard
    revenue_trends,    // dashboard
    sales_data,        // dataset for self-service exploration
  ]
}
Step 3: Generate credentials and embed
The backend/frontend pattern is similar. Generate a JWT token and load it in an iframe. The key difference is that the payload references your portal object instead of a single dashboard.
For the full walkthrough (including preview, publishing, and credential generation), head to the Embed Portal guide.
Next steps
- Single Dashboard Settings: customize dashboard behavior and appearance
- Embed Portal Deep Dive: full guide for multi-dashboard self-service embedding
- Security: understand token expiry, data isolation, and best practices
- FAQs: common questions and troubleshooting tips