Version Control with Git
This feature is only available on Holistics 4.0 (Analytics As-Code). Please reach out if you want access to Holistics 4.0.
This section assumes that you are familiar with Git and Version Control concepts. In case you need a refresher, here are some excellent materials:
Introduction
In Holistics, all of your analytics code are version-controlled with Git. This means you can enjoy the benefits of Git within the Holistics development environment, such as:
- Isolated Environment: Multiple data builders can work on different code branches without blocking each other.
- Audit logging: Keeping track of the changes made to your analytics code base, knowing who modified what,
- Applying code review procedure to double-check, approve and disapprove changes. Deploy only when you are confident with your changes.
- "Time-travelling": Reverting to a previous version in case something bad happens.
The basic features of Git are made accessible via the friendly graphical interface of of AML Studio. On the other hand, advanced users still have access to all underlying Git features by using the command line.

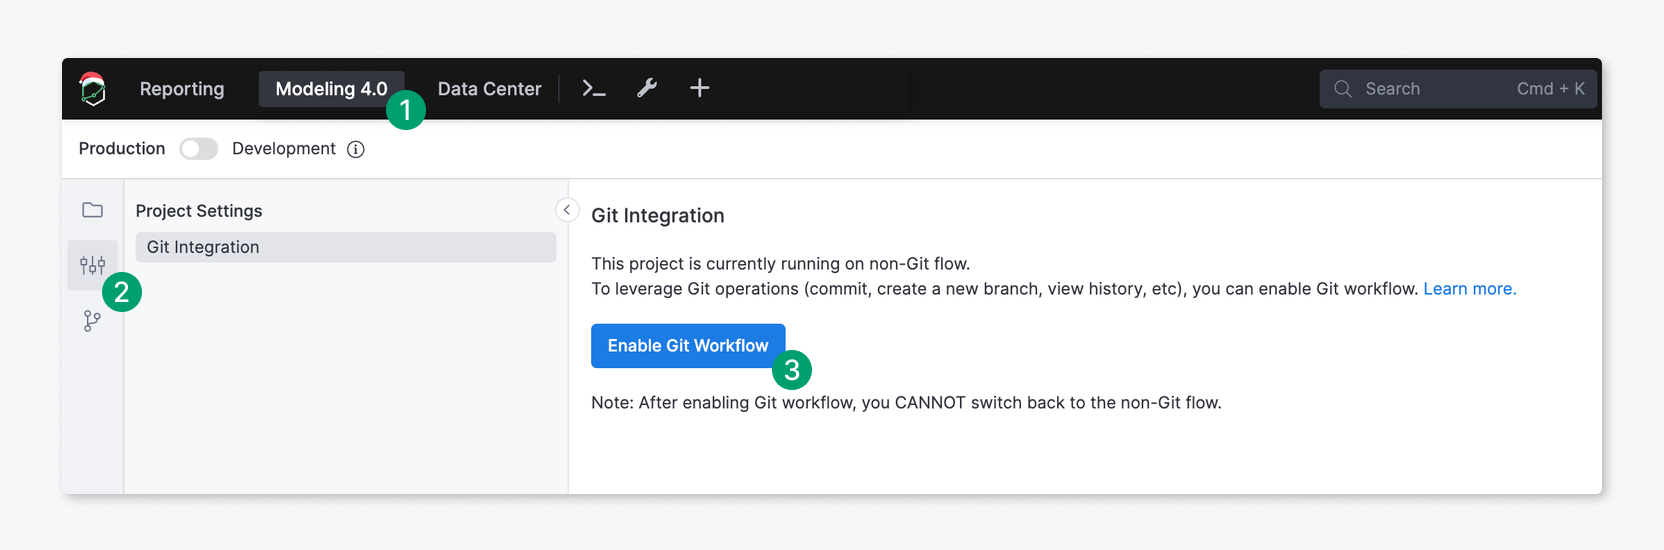
Enable Git Work Flow
Simply go to Modeling 4.0 > Settings tab > click "Enable Git Workflow".
By default, Holistics will use a System Repository to keep track of code changes. You can also connect to an external repository that you manage yourself.
High-level Workflow
A typical workflow in AML Studio involves the following operations:
Enable Development Mode: In Modeling 4.0 page, the Production mode is a "read-only" mode where you will see codes in the
masterbranch which was already deployed to production. To start making changes, simply toggle to Development mode.- Work on an existing branch: In case you return to work on an existing branch, and the branch's code is already out-dated comparing to production, you will need to click Pull from production to update your branch.
- Create a new branch: You can also create a new branch out of the
masterbranch to have access to the most up-to-date code, or create a new branch out of a development branch to further test your ideas.
Make changes & record changes: After making changes in your code base, you need to Commit and Push to record the changes to your code base. You can easily abort the changes that you have not committed, or even restore a previously committed version.
Validate Reports: Before deploying your new changes to Production, it is advisable to use the Report Validation feature to check if the changes have broken any downstream reports.
Deploy: After you have validated your code and committed all changes, click Deploy to production to make your new and updated models & datasets available to end-users.
In reality, the development workflow may not be so straight-forward. Here are some other operations that you may need to know about:
Mechanism
The version control feature of Holistics is powered by Git. Behind the scenes, Holistics tracks analytics code changes with one of the following:
- System Repository: A Git repository that Holistics maintains internally on the server.
- User Repository: A Holistics-managed repository for each user.
- External Repository: Repository that sits on customers’ servers or Git providers (like Github or Gitlab)
You can either use Holistics' default repository, or connect to your own external Git repository:
Without External Git repository


With External Git repository - Holistics Cloud Editor
