Dynamic data sources for embedded analytics
This feature is available on select plans. If your team does not have access to this feature, please contact [email protected].
Introduction
When implementing embedded analytics, you often need to serve customers who each have their own separate databases. Rather than creating duplicate dashboards for every customer, you can configure a single embedded dashboard that dynamically connects to the appropriate database based on which customer is viewing it.
This guide walks you through setting up Dynamic Data Sources for embedded analytics. You'll learn how to pass user attributes in your embed payload and have Holistics automatically route queries to the correct database.
How it works
Before diving into implementation, here's how the dynamic data source mechanism works at a high level:
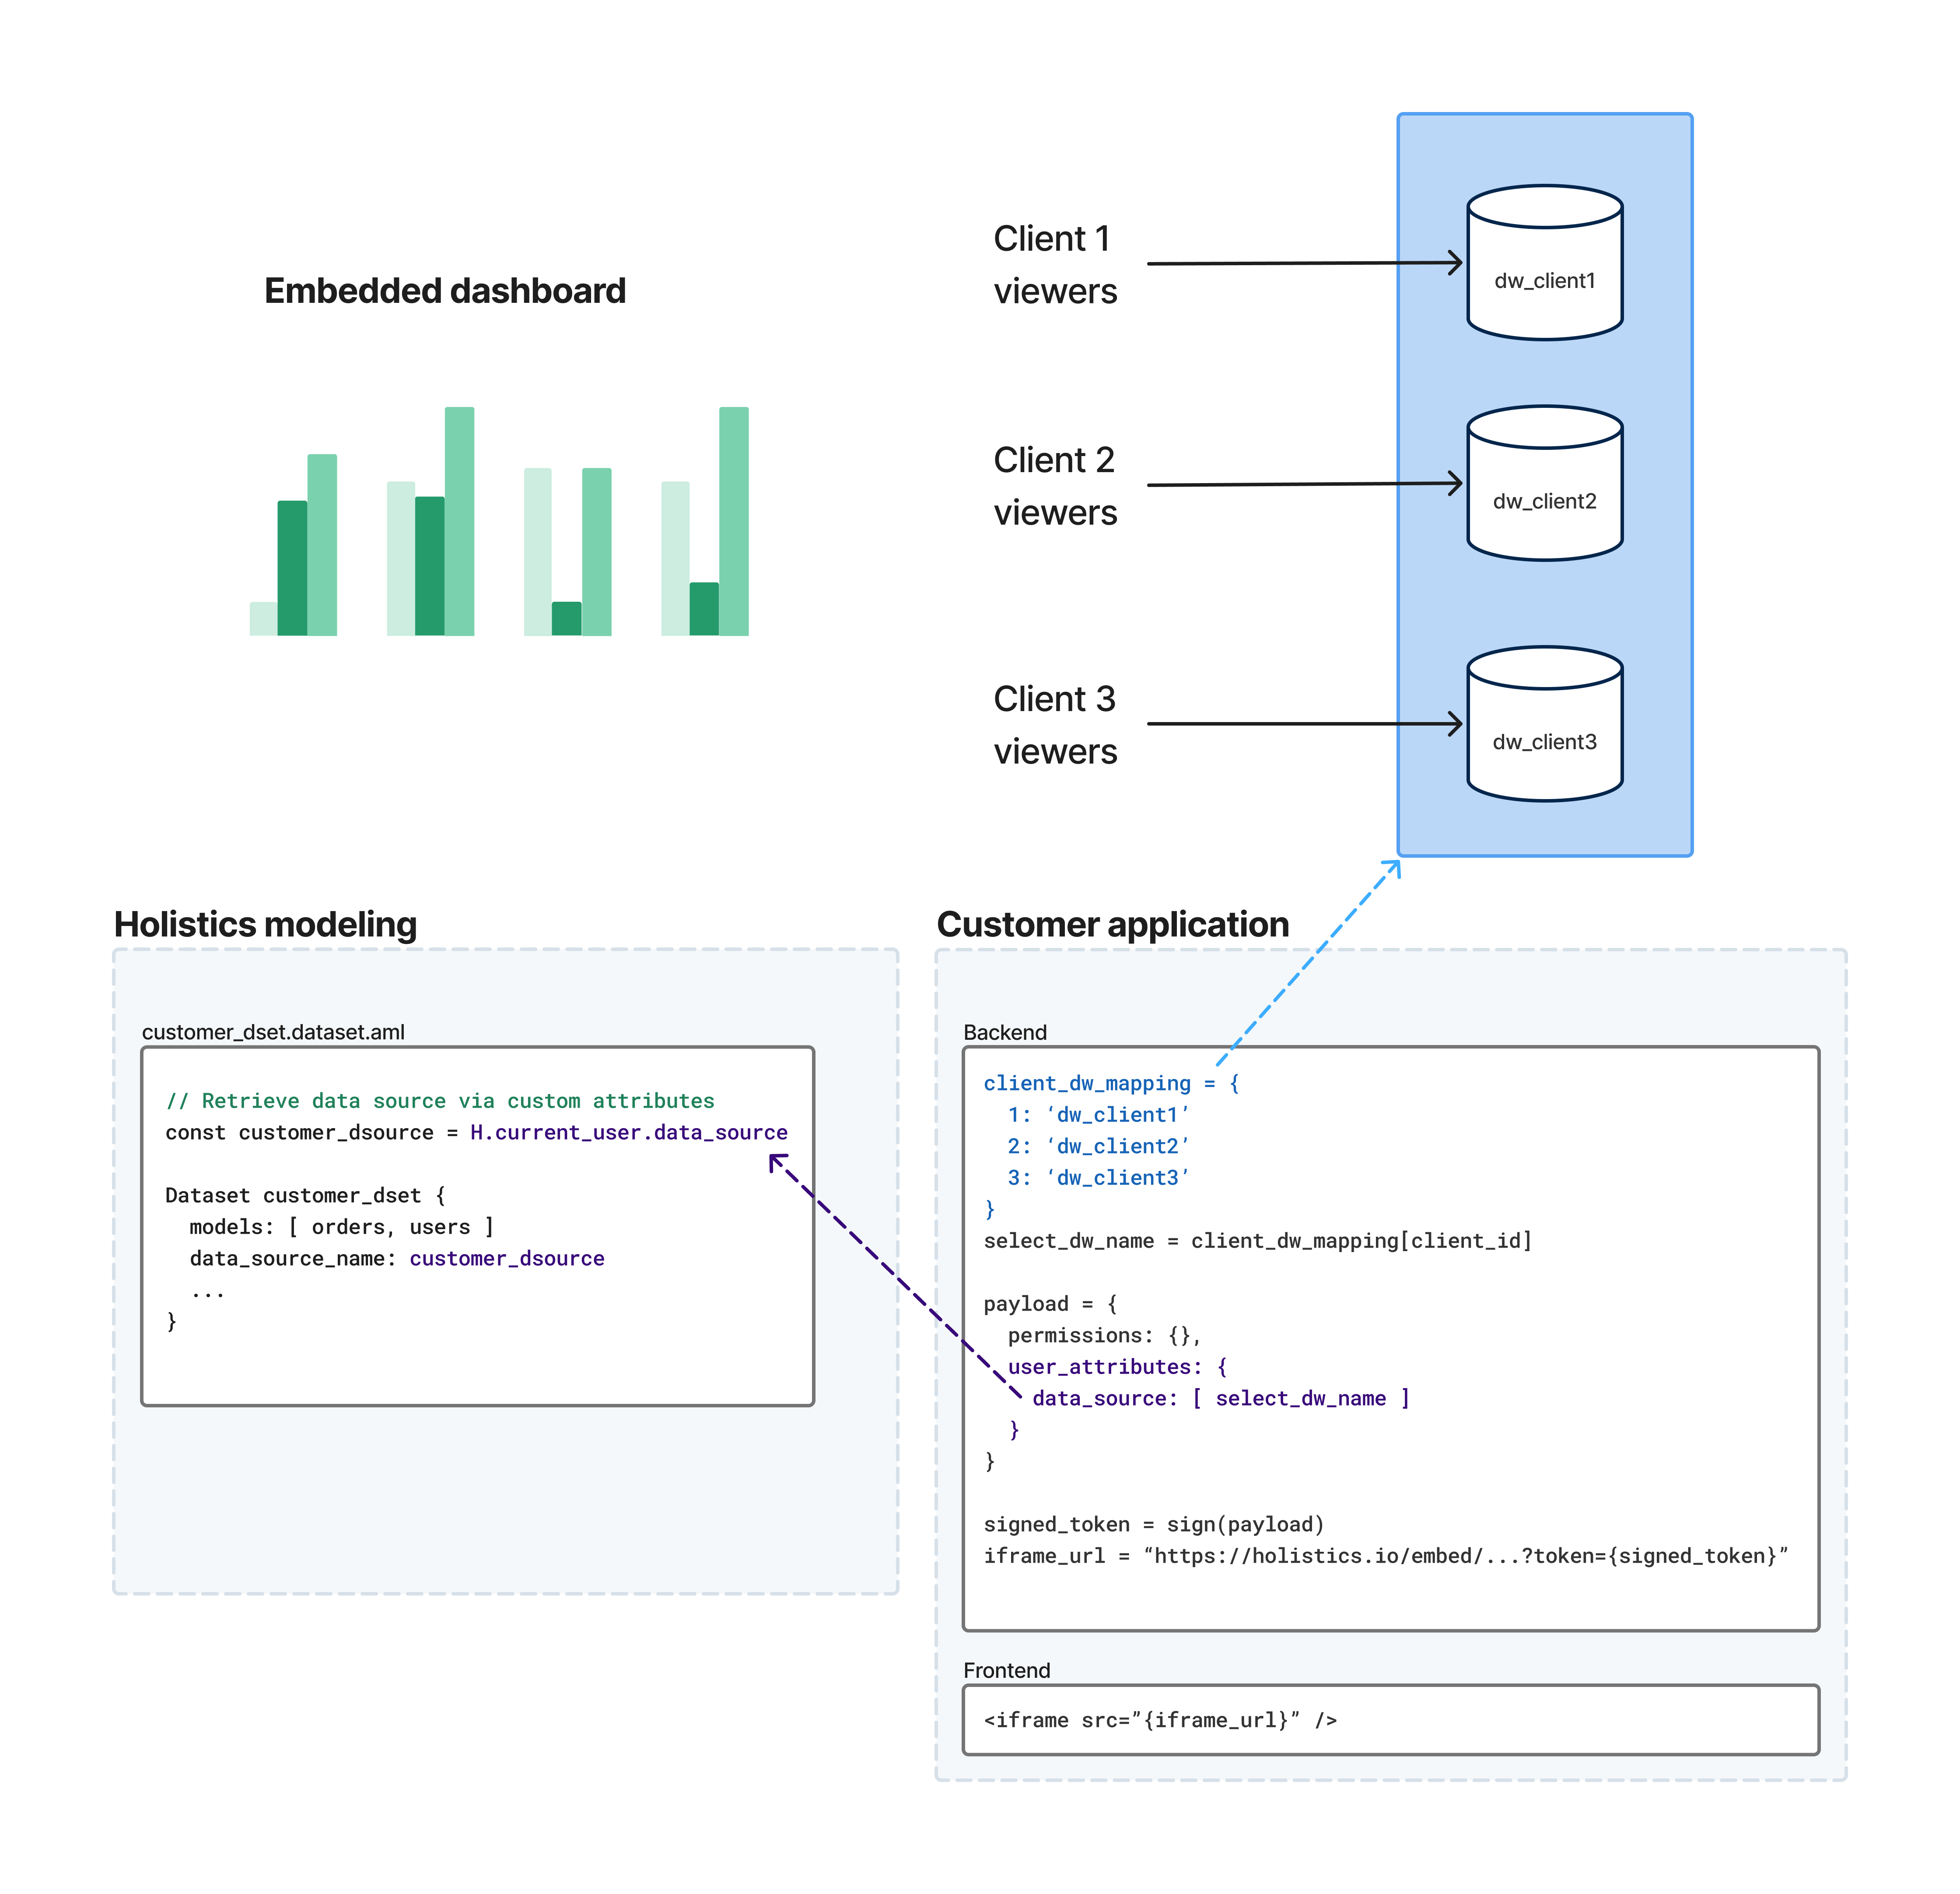
The flow works like this:
- Your backend identifies the customer - When a user accesses your embedded dashboard, your application determines which database they should connect to
- You pass user attributes in the embed payload - Your backend includes user attributes (e.g.,
data_source,schema, or any custom user attribute) in the signed embed token - Holistics routes the query - When the dashboard loads, Holistics reads the user attributes and uses them to evaluate dynamic expressions in your AML code (e.g., routing queries to the correct database)
This approach lets you maintain a single dashboard definition while serving data from multiple customer databases.
For a deeper understanding of the underlying mechanism and all available variables (user attributes, system attributes, built-in variables), see Dynamic Data Source.
Dynamic data source implementation
Follow these steps to configure dynamic database connections for your embedded dashboards.
Step 1: Connect your customers' databases
First, connect all of your customers' databases to Holistics.
When naming each data source, use a unique and meaningful identifier (e.g., customer_acme, customer_globex). You'll reference these names in your embed payload to specify which database to use.
Step 2: Create user attributes
Before you can pass user attributes in your embed payload, an admin must manually create them in Holistics first. User attributes are not auto-created. If you pass a user attribute in the embed payload that doesn't exist in Holistics, it will be ignored.
For dynamic data sources, you'll typically create a user attribute named data_source (or any name you prefer, as long as it matches what you reference in your AML code).
Navigate to Settings > User Attributes and create the user attributes you need. See User Attributes Documentation for detailed instructions.

You can use H.current_user.<attribute_name> in your AML code to access any user attribute passed through the embed payload. This works with any custom user attribute, not just data_source.
Step 3: Create a dynamic variable in AML
Next, create an AML variable that reads the user attribute and provides a fallback value.
Go to the Development tab, create a new file (e.g., embedded_variables.aml), and add:
const ds_name = if (H.current_user.data_source) {
                  H.current_user.data_source
                } else {
                  'default_data_source'
                }
Setting a fallback value (like 'default_data_source') is recommended. If you forget to pass the user attribute in your embed payload, the fallback ensures your embedded dashboard still loads instead of showing an error.
You can name the file and variable anything you like, as long as the file ends with .aml and the variable name is valid AML syntax.
Step 4: Update your dataset configuration
Modify the dataset that powers your embedded dashboard to use the dynamic variable. Since AML constants are globally accessible, you can reference ds_name from any file in your project.
Dataset dynamic_client_dataset {
  label: 'Dynamic Client Dataset'
  data_source_name: ds_name
  models: [orders]
  relationships: []
}
Now the dataset will connect to whichever data source is specified in the embed payload.
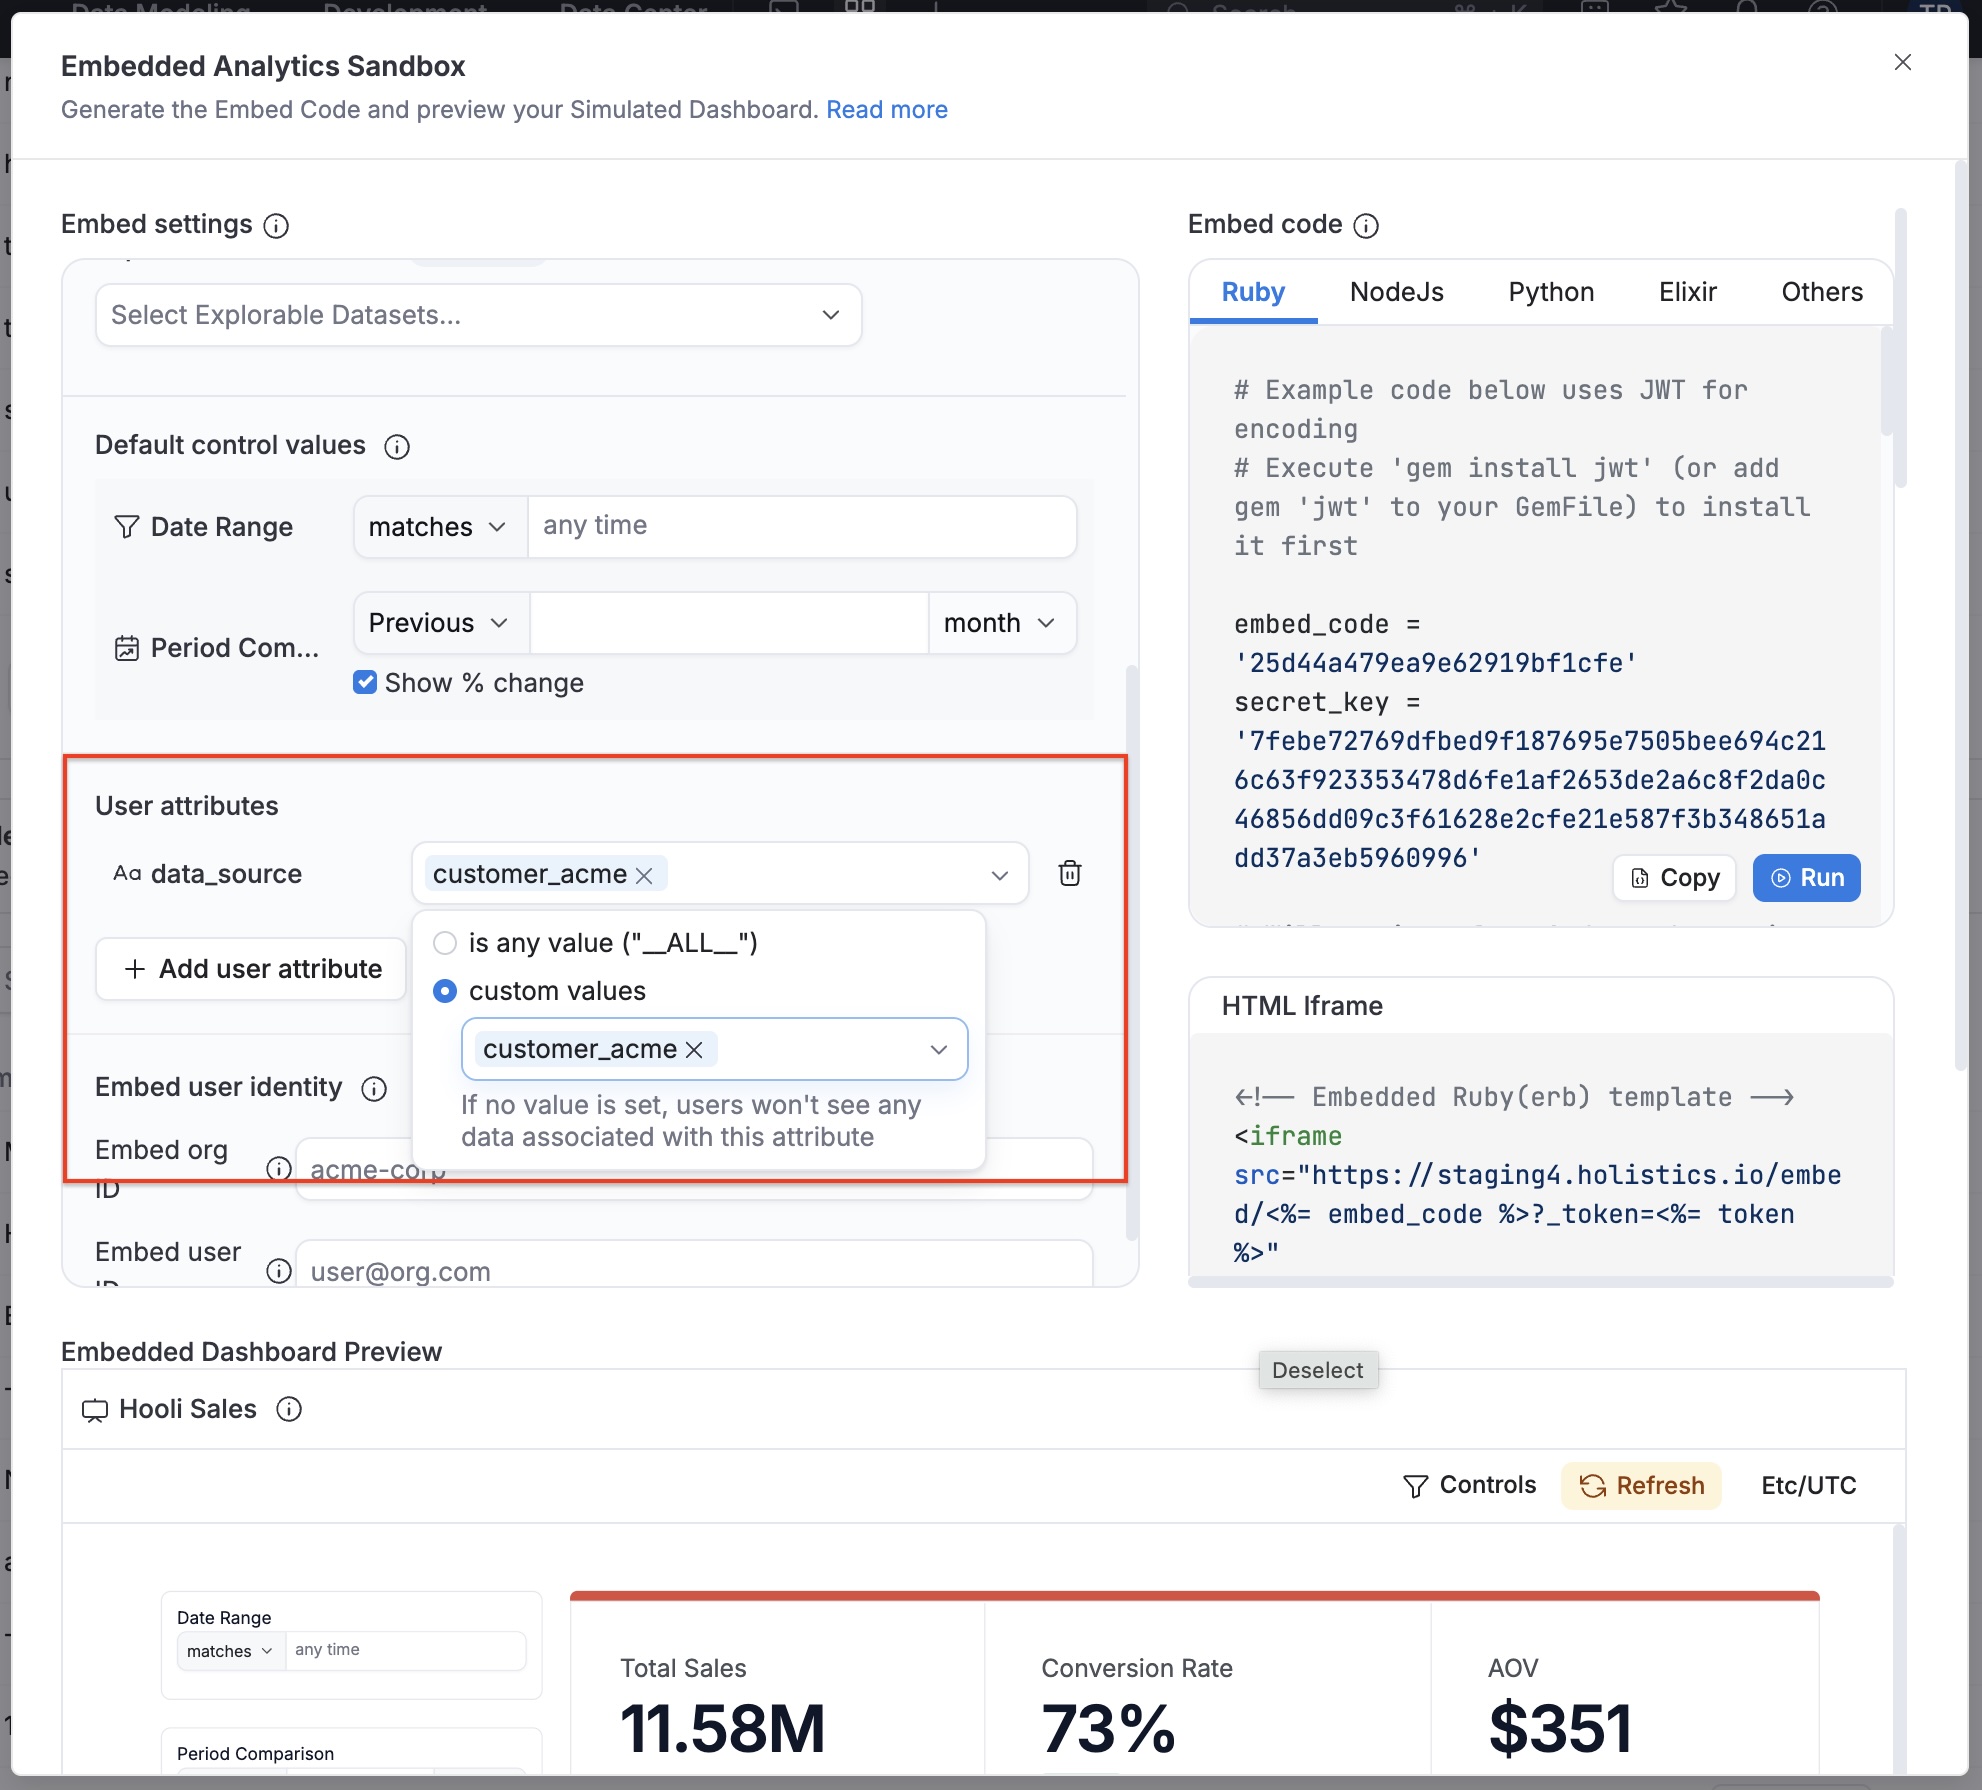
Step 5 (Optional): Test in embed sandbox
Before wiring everything together, you can use the sandbox to verify your configuration so far. Test with different user attribute values (e.g., data_source, schema, or any custom user attribute) and confirm that queries route to the expected databases.
Depending on which embedding method you're using, follow the appropriate section below:
Single Dashboard Embedding
Use the Embedded Analytics Sandbox to test your dynamic data source configuration.
Embed Portal
You can test your embed portal's dynamic data source configuration in two ways:
- Preview in Development: test directly from the Development tab
- Embed Portal Sandbox: available in Tools > Embedded Analytics after you published your changes
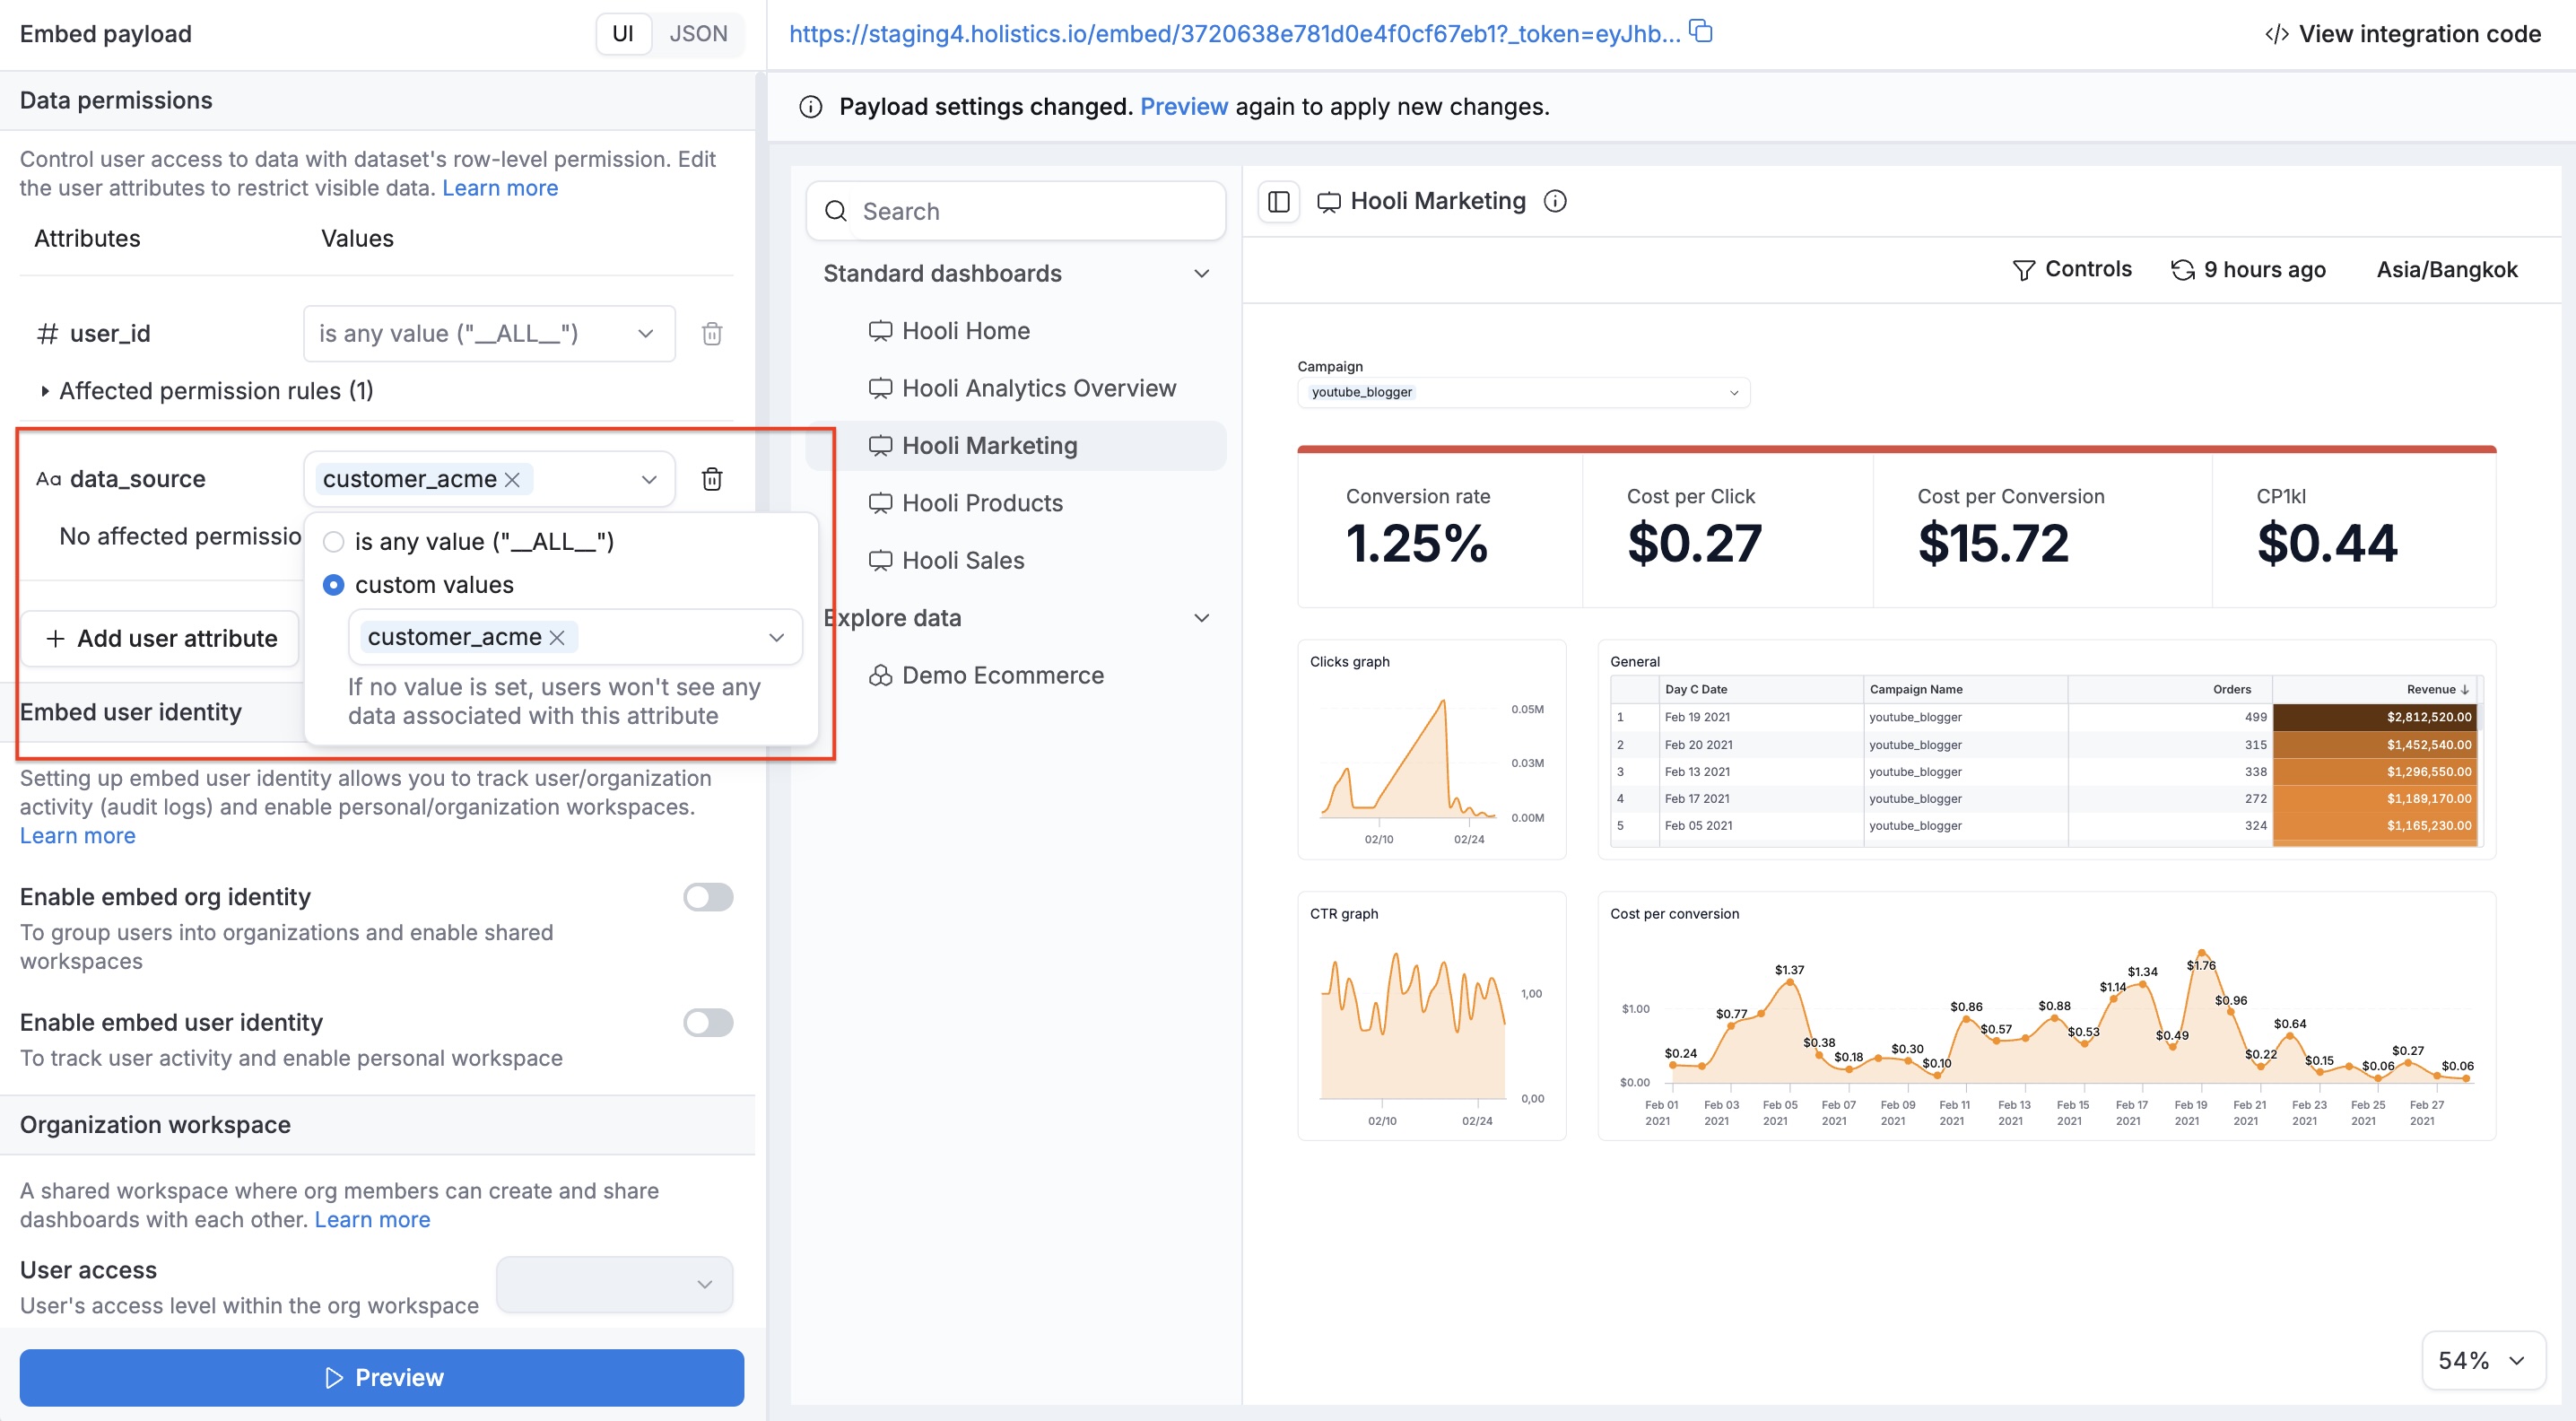
Step 6: Pass user attributes in your embed payload
Finally, when generating the embed token on your backend, include the user attributes that your AML code references:
// Embed payload
embed_payload = {
  permissions: {},
  user_attributes: {
    data_source: ['customer_acme'],   // Routes queries to the right database
    region: ['us-west'],              // Any custom user attribute your AML code references
  }
}
Each user attribute value is an array of strings (even when you're passing a single value). These values become accessible in your AML code via H.current_user.<attribute_name> (e.g., H.current_user.data_source, H.current_user.region).
Your backend logic should determine the correct user attribute values based on your customer identification system.
Your AML changes (dynamic variables, dataset configuration) only take effect in production after you publish them. Make sure to publish before testing your embed integration.
Alternative: Dynamic schema
If your customers share the same database but use different schemas (common in multi-tenant architectures), you can use schema instead of data_source. The setup follows the same pattern. The key difference is where you apply the variable.
Instead of setting data_source_name at the dataset level, you interpolate the schema into table_name or query at the model level:
// Define the variable (same pattern as data_source)
const schema_name = if (H.current_user.schema) {
                        H.current_user.schema
                      } else {
                        'default_schema'
                      }

// Use in TableModel
Model dynamic_model {
  type: 'table'
  data_source_name: 'my_wh'
  table_name: '${schema_name}.cities'
}

// Or in QueryModel
Model dynamic_query_model {
  type: 'query'
  data_source_name: 'my_wh'
  query: @sql
    select * from ${schema_name}.cities
  ;;
}
Then pass the schema in your embed payload:
embedded_payload = {
  permissions: {},
  user_attributes: {
    schema: ['tenant_acme']
  }
}
See also
- Dynamic Data Sources: full reference including available variables, system user attributes, and built-in variables like
H.git.is_production - Dynamic Schemas: switch schemas within the same database
- User Attributes: managing user attributes in Holistics