Pull Request Workflow
Introduction
In a typical development process, when you make changes in the development branch, you need to create a Pull Request (in GitHub) or a Merge Request (in GitLab) before publishing to production. This allows other users to review your changes and triggers the CI workflow for testing and validation.
This step is essential to ensure no downtime and maintain code quality in the production environment.
How PR Workflow works in Holistics
The PR Workflow in Holistics integrates with your GitHub repository to enforce code review practices.
1. Create PR from Holistics
When you've made changes and committed them in your Development workspace, Holistics provides a convenient "Create PR" button that takes you directly to GitHub with a pre-filled pull request for your branch.
2. Track PR status
Once created, Holistics displays the PR status right in your workspace, keeping you informed without switching contexts. You can continue making commits, and they'll automatically update the existing PR.
3. Auto-publish on merge
When your PR is approved and merged to the master branch in GitHub, Holistics automatically detects this and publishes your changes to production. Your dashboards and reports become immediately available to end users - no manual publish step required.
4. Error handling
If there are any errors during the auto-publish process, Holistics will notify you and provide options to resolve them before the changes go live, ensuring a smooth deployment experience.
This workflow ensures that all production changes go through proper review while maintaining a smooth, automated deployment process.
How to setup PR Workflow in Holistics
The setup depends on how your repo is connected to Holistics:
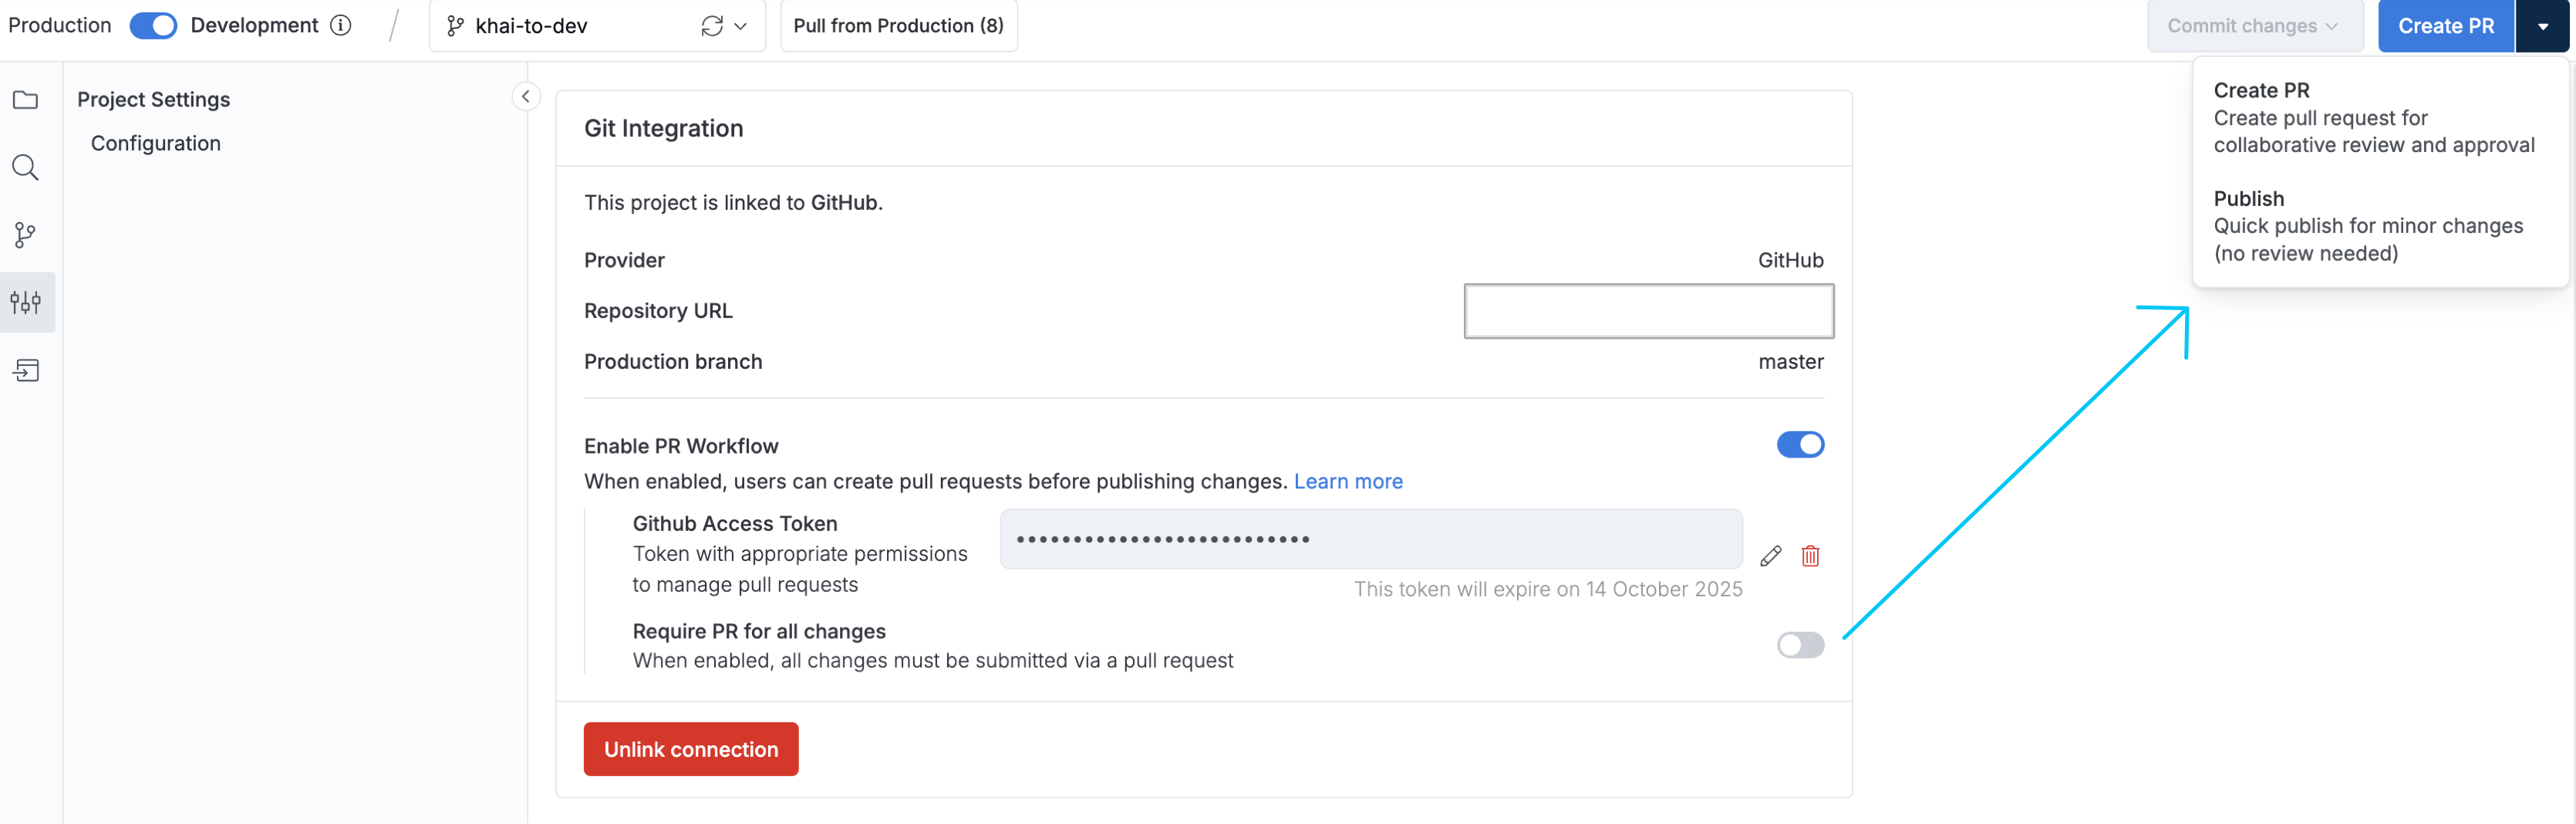
- Connected via GitHub App: PR Workflow is ready to go. Just toggle Enable PR Workflow in Project Settings → Git Integration. No token needed.
- Connected to GitHub via SSH Deploy Key: Follow the GitHub Pull Request setup guide to configure a Personal Access Token.
- Connected to GitLab: See the GitLab Merge Request setup guide for Project Access Token configuration.
All paths deliver the same core functionality (enforcing code review before production deployment), but use different authentication methods based on your provider and connection choice.
Using the PR Workflow
After setting up the workflow for your Git provider, the process is the same regardless of whether you use GitHub or GitLab:
Step 1: Create a Pull/Merge Request
- Make your changes in the Development Workspace and commit them
- Click the Create PR button (GitHub) or Create MR button (GitLab) in the top right corner
- You'll be redirected to your Git provider to complete the PR/MR creation
- Return to Holistics to see the PR/MR status tracked as "Open"
Step 2: Collaborate and iterate
- Team members can review your changes and leave comments in your Git provider
- Continue making commits in Holistics - they'll automatically update the existing PR/MR
- No need to create new PRs/MRs for additional changes
Step 3: Auto-publish on merge
- Once approved and merged to the
masterbranch, changes automatically publish to production - If auto-publish fails, use the Publish button in Holistics to retry manually
- For custom publish logic (e.g., avoiding weekend deployments), use our Publish API
Configure PR workflow required or optional
Admin can control whether Pull/Merge Requests are mandatory for all changes or optional, giving teams flexibility to balance code review requirements with the need for quick fixes.
How it works
-
Default behavior: By default, PR/MR is not required. Users can publish changes directly from Development to Production without creating a Pull/Merge Request.
-
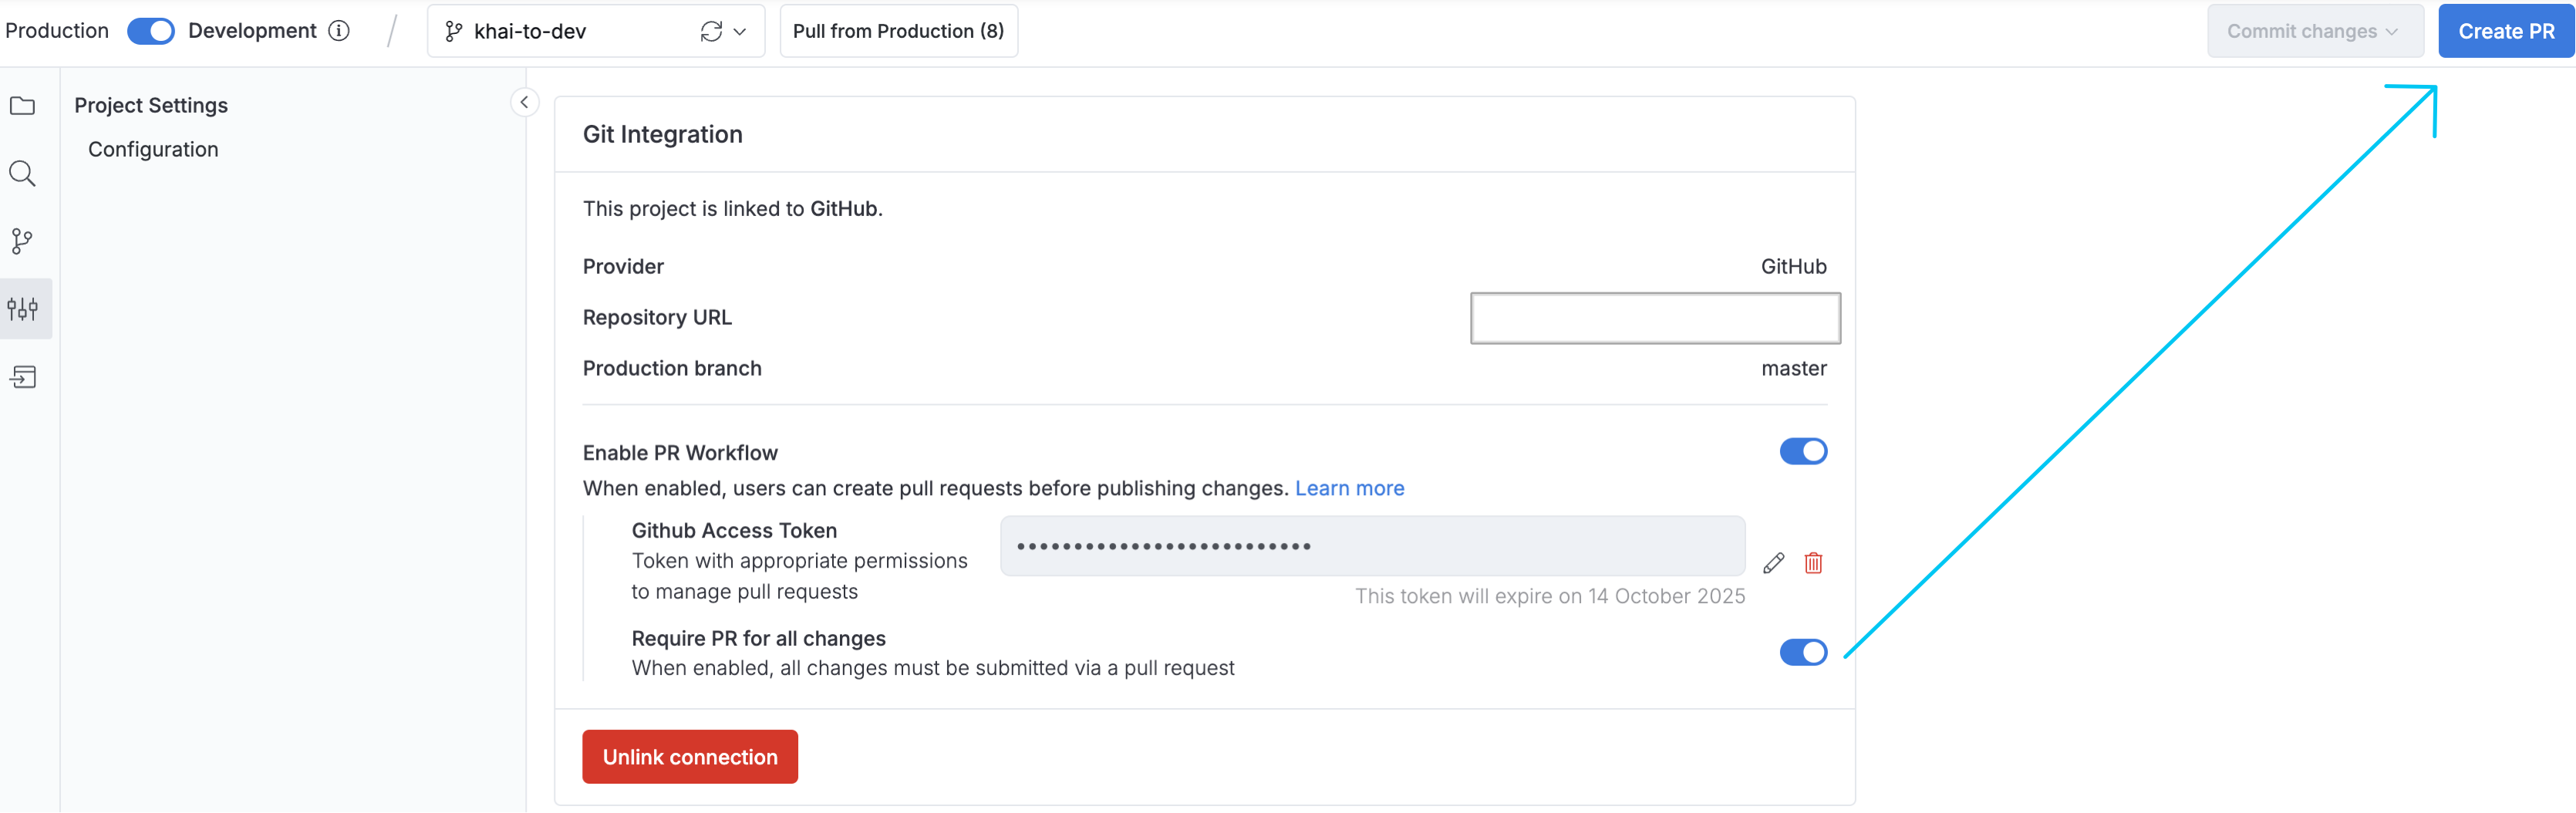
Enabling PR/MR requirement: When you toggle on "Require PR for all changes", every change must go through a Pull/Merge Request before it can be published to production. This ensures all code modifications are reviewed before going live.
Configuration steps
- Navigate to Settings > Project Settings > Git Integration
- Under the PR/MR Workflow section, locate the "Require PR for all changes" toggle
- Toggle it ON to require PRs/MRs for every change, or leave it OFF to allow direct publishing
Impact on workflow
When PR/MR is NOT required (default):
- Users can publish changes directly using the "Publish" button
- Suitable for teams that trust analysts to make small, low-risk changes
- Faster deployment for urgent fixes
When PR/MR is required:
- The "Publish" button is disabled
- Users must create a PR/MR for every change, regardless of size
- All changes go through review process
- Better for teams requiring strict change control
Consider your team's needs:
- Require PRs/MRs: Best for teams with compliance requirements or those wanting strict review processes
- Keep optional: Suitable for experienced teams who can judge when reviews are needed