Filter Controls
Dashboard filters let viewers instantly focus on the data they care about: whether that's a specific region, time period, or customer segment. Instead of creating separate reports for different audiences, you build once and let viewers control what they see.
This guide focuses on dashboard-level filter controls that apply across multiple widgets. You can also apply filters at the block-level (pre-applied conditions on individual widgets).
What is a Filter Control?
Filter control blocks let viewers narrow down results to see only the data that matters to them.
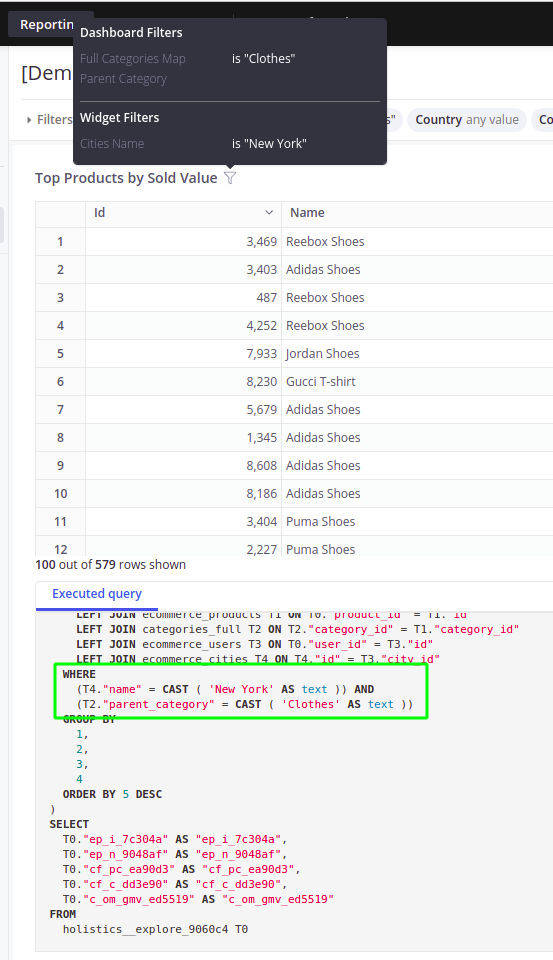
When someone changes a filter value (like selecting "Indonesia" for Country), all connected widgets automatically update to show only that data.
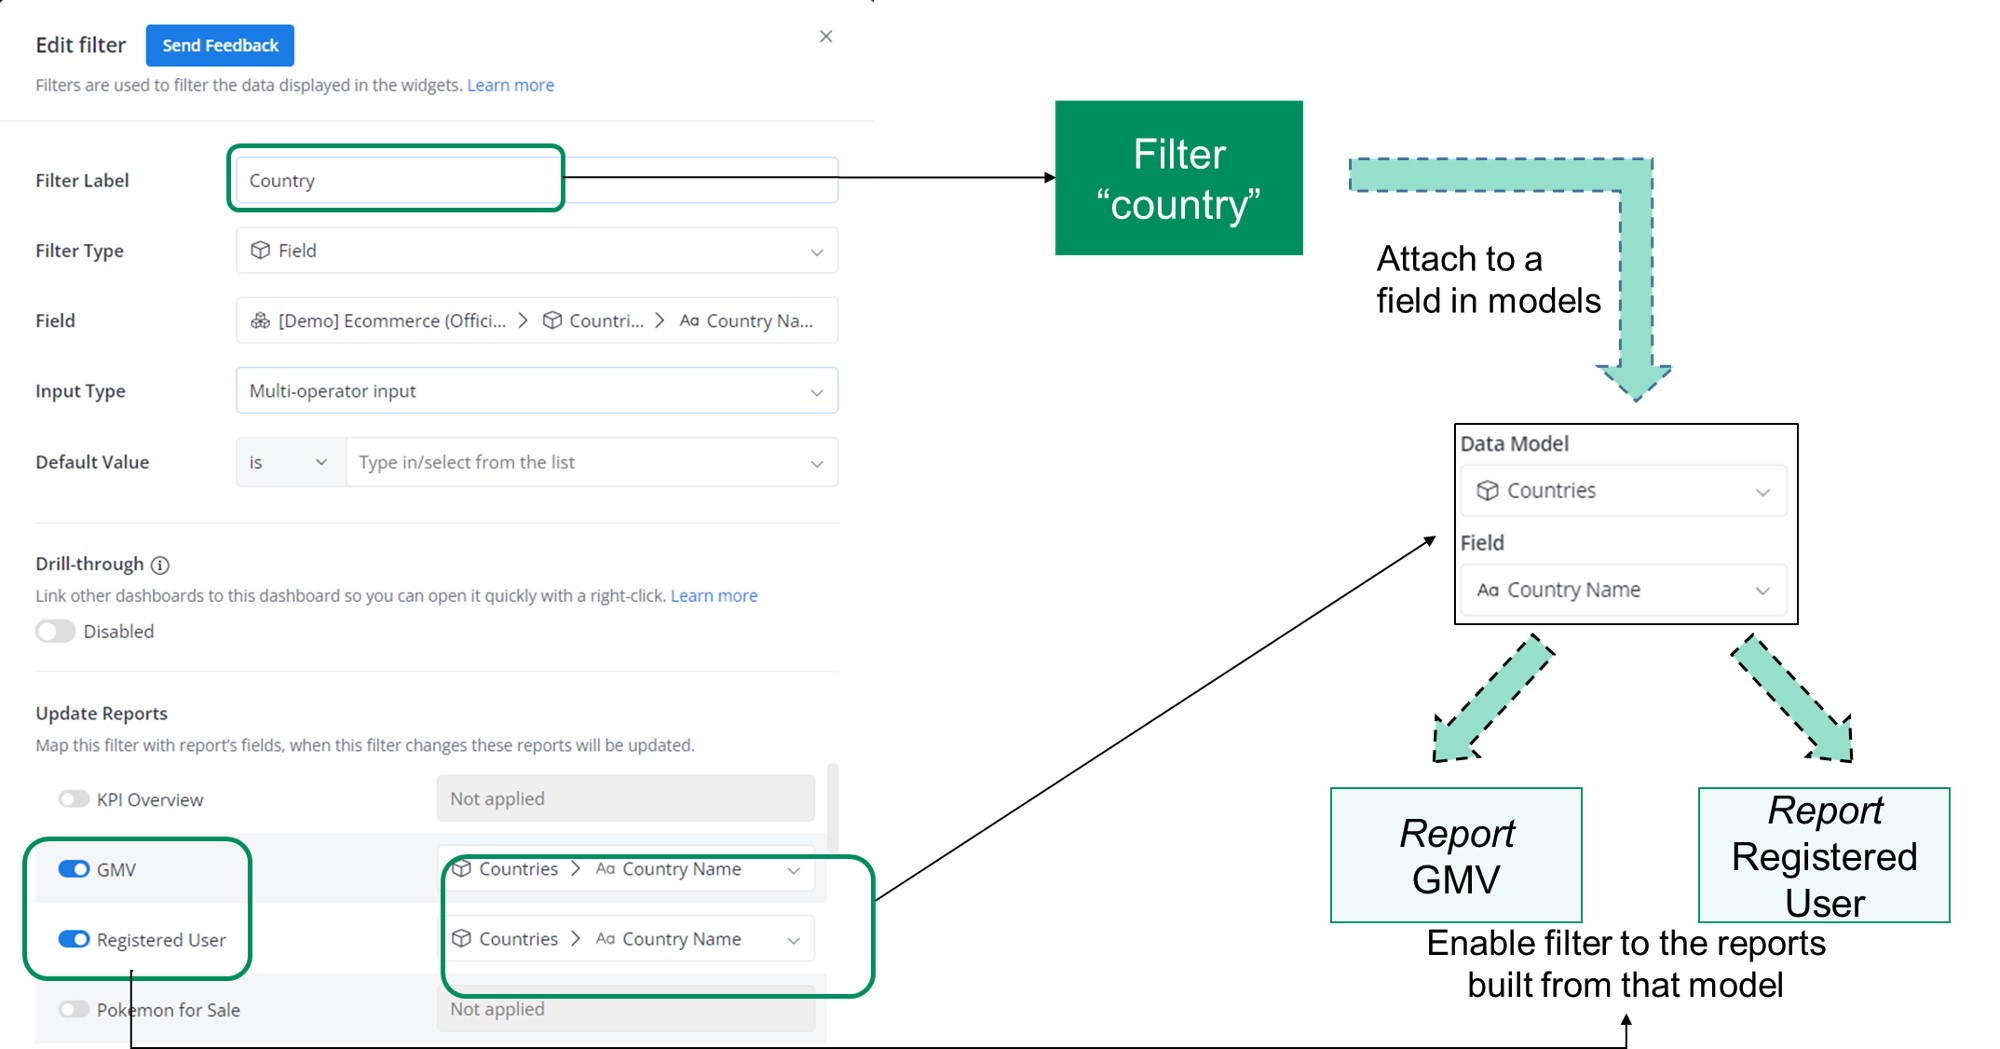
Behind the scenes
Example: You create a "Country" filter and set it to "Indonesia"
- What viewers see: The GMV and Registered User widgets instantly show only Indonesia data
- What happens: The filter connects to the model field
countries.country_nameand adds the conditionWHERE countries.country_name = "Indonesia"to all linked widgets
You also don’t necessarily need to add a field to your results to filter on it.
For example, you can create a query that filters the Order Country in Indonesia, even though your results don't contain the Order Country field.
Mass Input of Filter Values
To filter on a large set of values, you can copy and paste a list of values into the Dashboard filter directly from a spreadsheet or clipboard.
Our mass input feature supports lists separated by: , enter tab.
This allows you to copy and paste a list of up to 2000 values.
Setting up filter controls
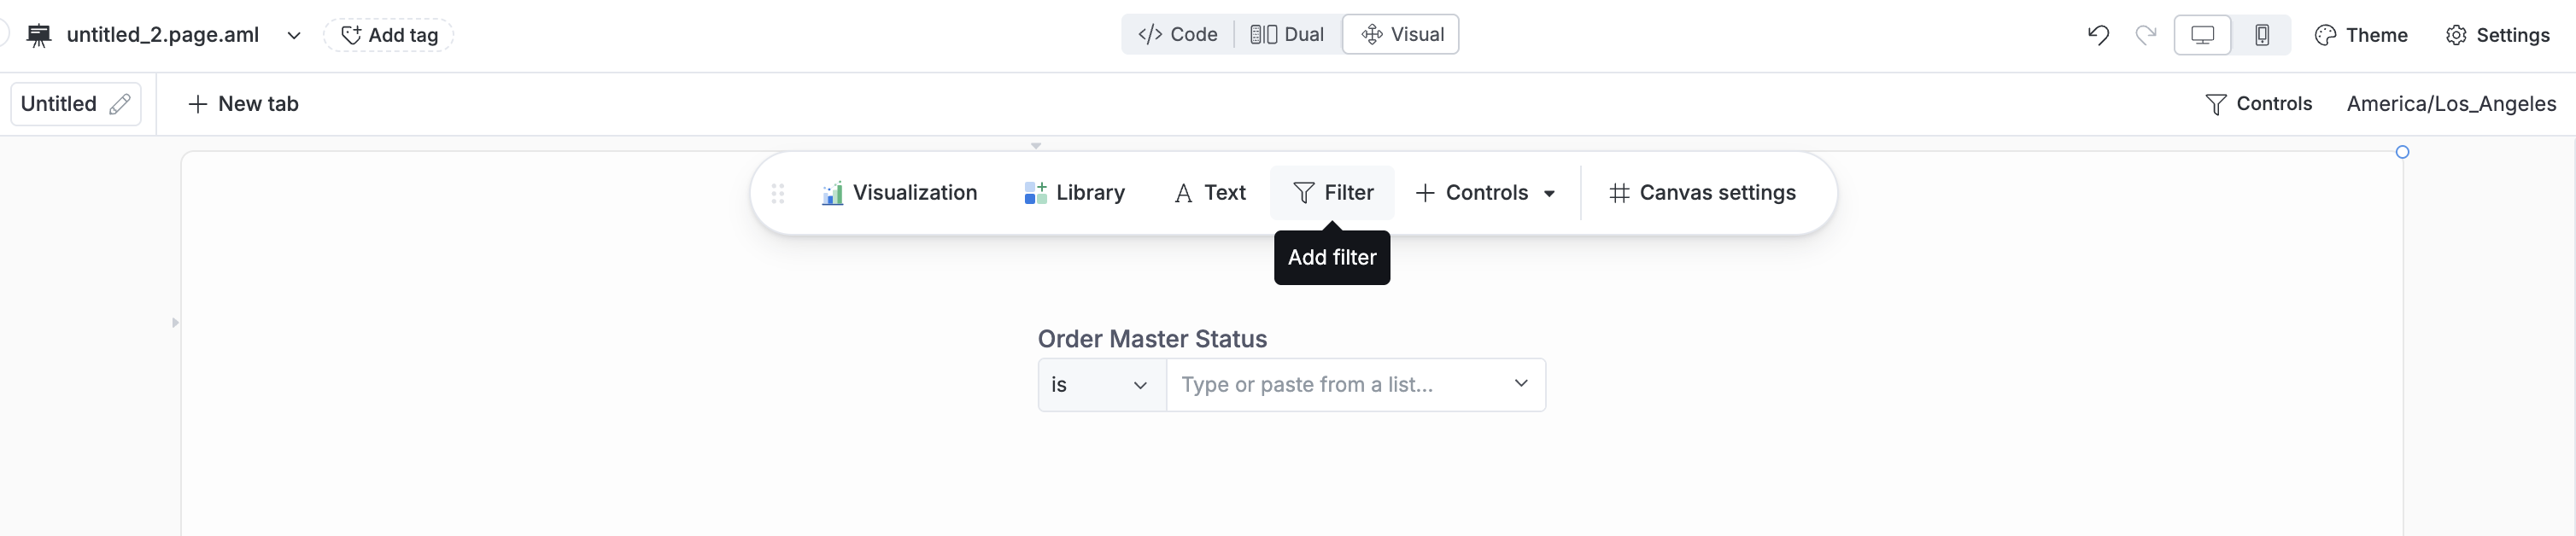
1 - Add Filter Control
From the dashboard page, click Add → Add Filter.
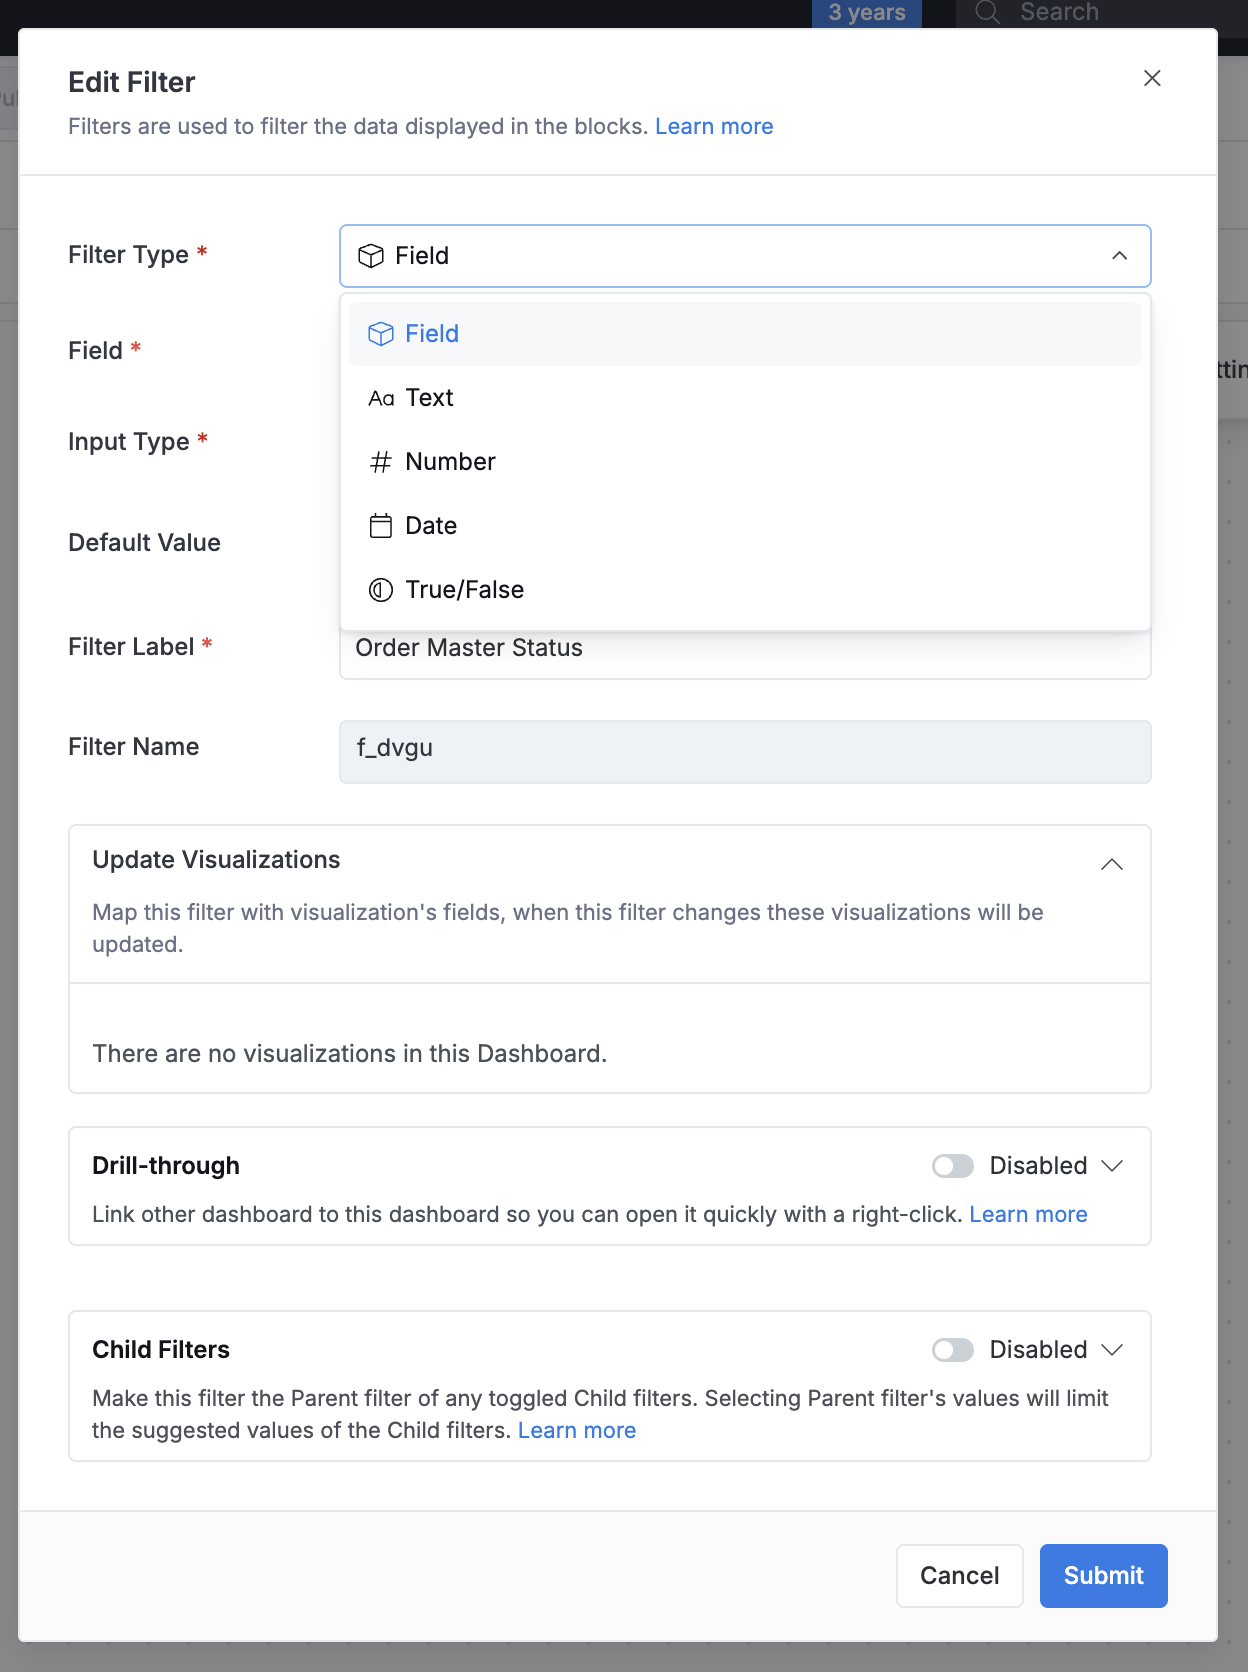
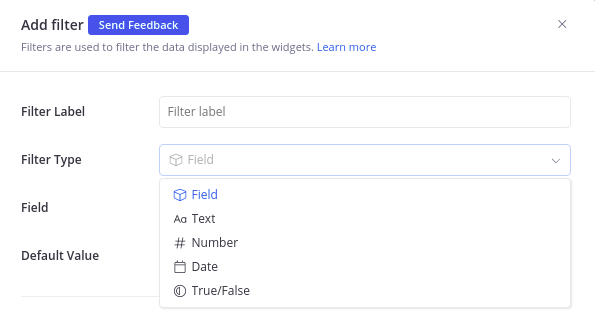
2 - Choose the Filter Type
For each type of filter, we have separate sections for setting up step-by-step.
Read more about different filter types and Field filters vs. manual filters.
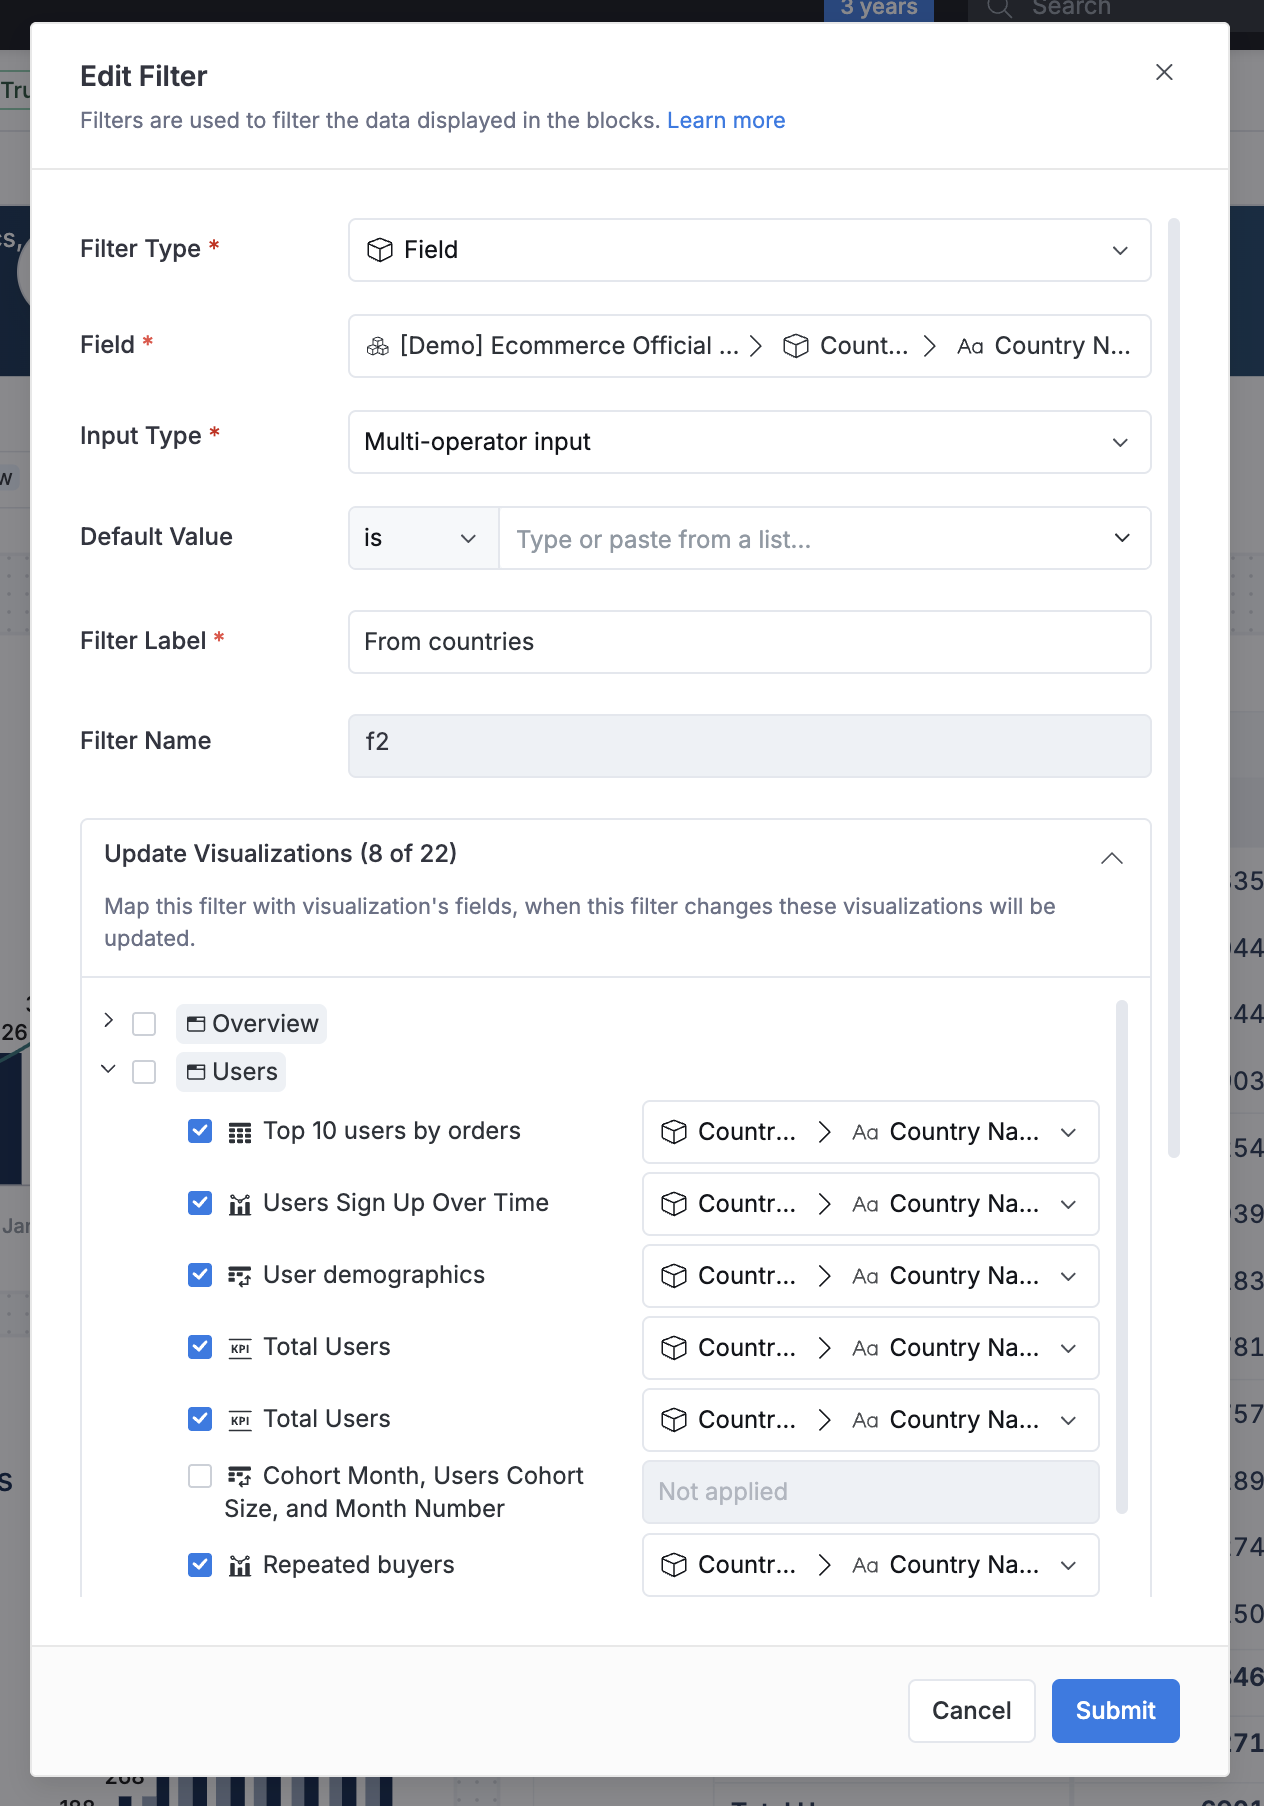
3 - Mapping filter controls with visualization blocks
You can select what visualization blocks you want to update in different tabs.
If you are using Field Filters, it will auto map to the visualization blocks in the same tab that come from the same dataset.
Filter Types
In Holistics, filters are divided into two categories:
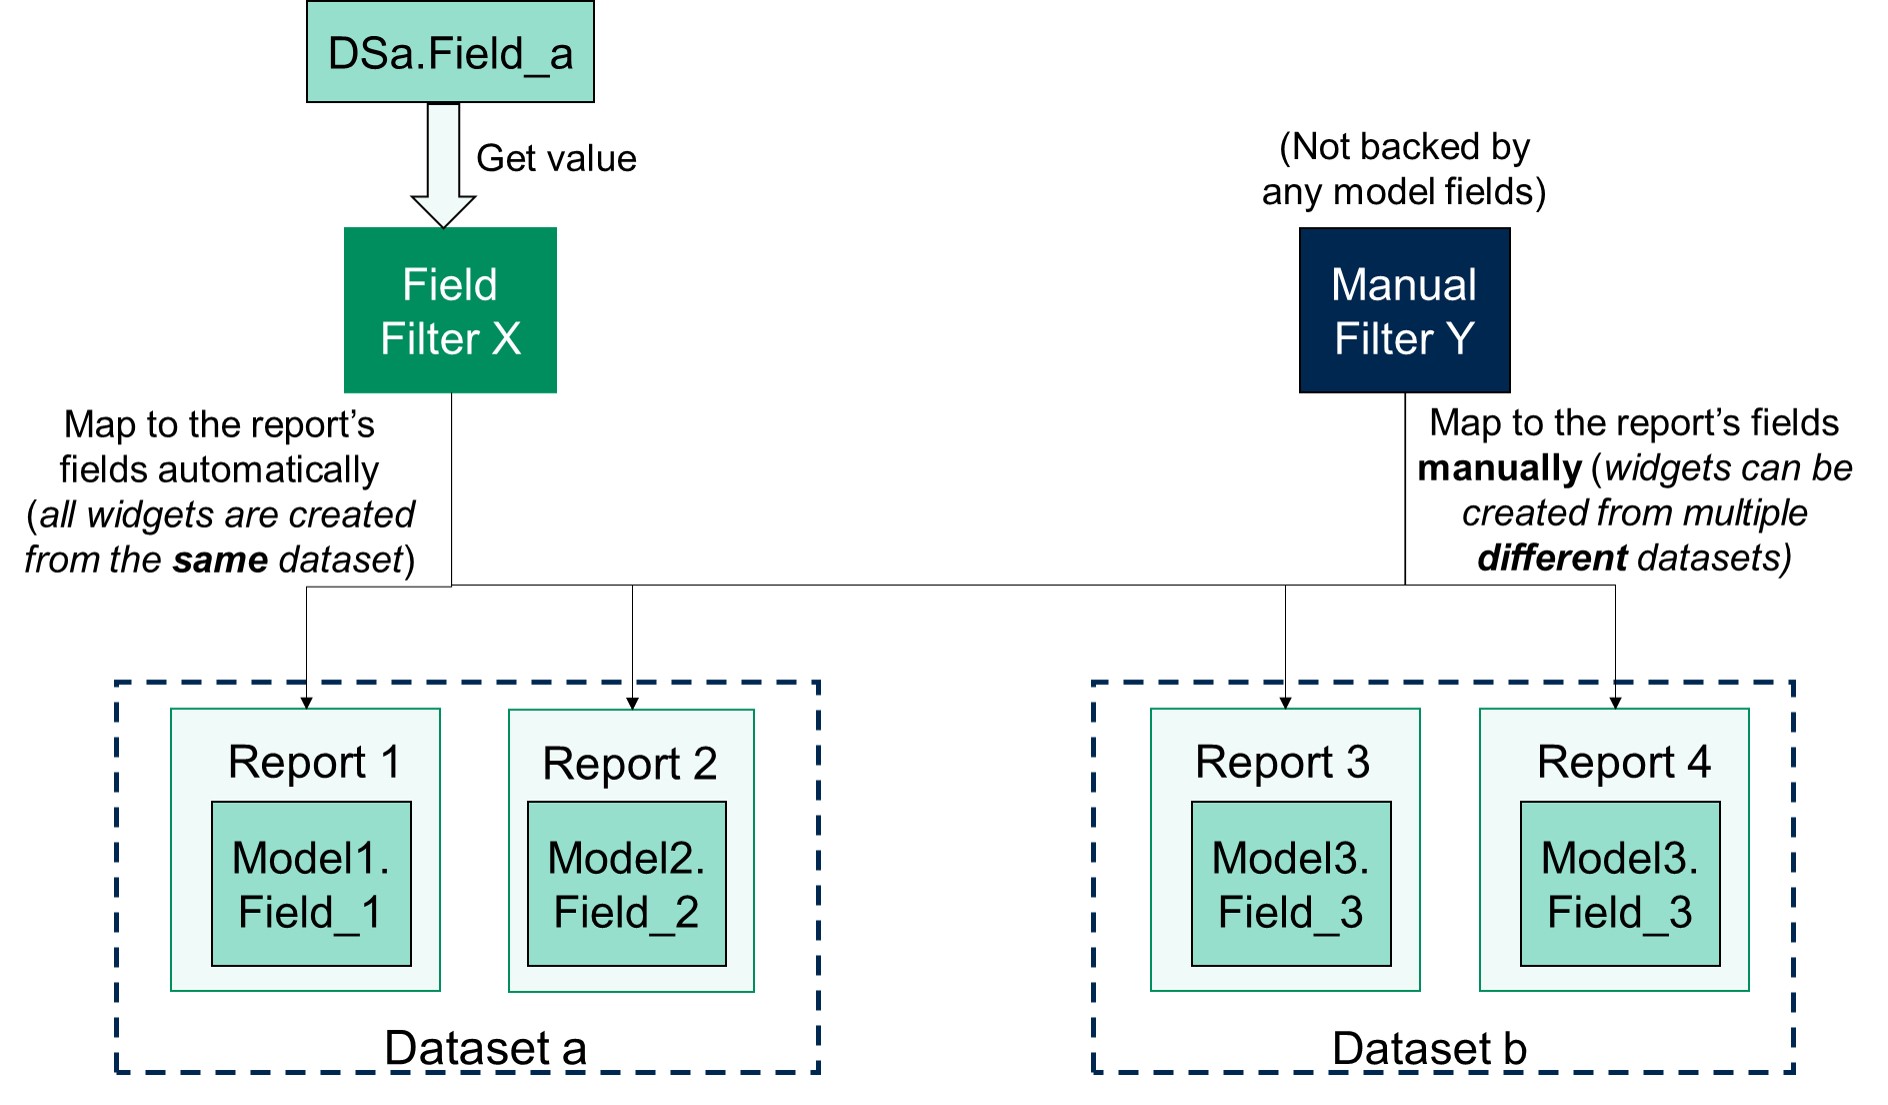
- Field filters: This category of filter gets information from a model field, and will take on the field's data type (Text, Number, Date, True/False)
- Manual filters: This category of filter is not backed by any model fields, and needs to be set up manually. This includes:
Please follow the links to the docs page for detailed information about each filter type.
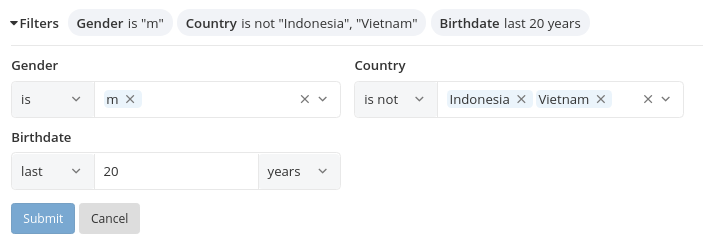
Structure of a Filter
- Operator: Specifies the comparison type, for example, IS, IS NOT...
- Value: The value of the filter. The value you can select/input depends on the data type of the filter.
- Modifier (optional): Only available for some of the operators in the Date filter (for example,
next,lastX days/months/years).
Supported Field Types and Operators
| Field type | Supported operators | Multiple values supported | Mass input supported |
|---|---|---|---|
| Text | is, is not | ✅ | ✅ |
| contains, does not contain, starts with, ends with, is null, is not null | ❌ | ❌ | |
| Number | equal, not equal | ✅ | ✅ |
| less than, greater than, between, is null, is not null | ❌ | ❌ | |
| Date | (all operators) | ❌ | ❌ |
| True/False | (all operators) | ❌ | ❌ |
Field Filters vs. Manual Filters
Field filters are recommended because:
- They are easy to set up
- They can be used for automatic Drill-through
- All visualization blocks from the same dataset will be automatically mapped
Manual filters should be used if:
- Your dashboard widgets are created from multiple different datasets
- You want to be extra careful when setting up filters
- You don't need convenient features like filter value suggestion or automatic mapping
Dashboard Filter Controls & Block Filters
A block filter is a filtering condition pre-applied to a block. It will not be overridden by the dashboard filter. Instead, the two filtering conditions will be combined with an AND operator.
Managing filter mappings
You can manage filter mappings from three places:
From filter blocks
Inside the filter block settings, you will see what blocks it maps to.
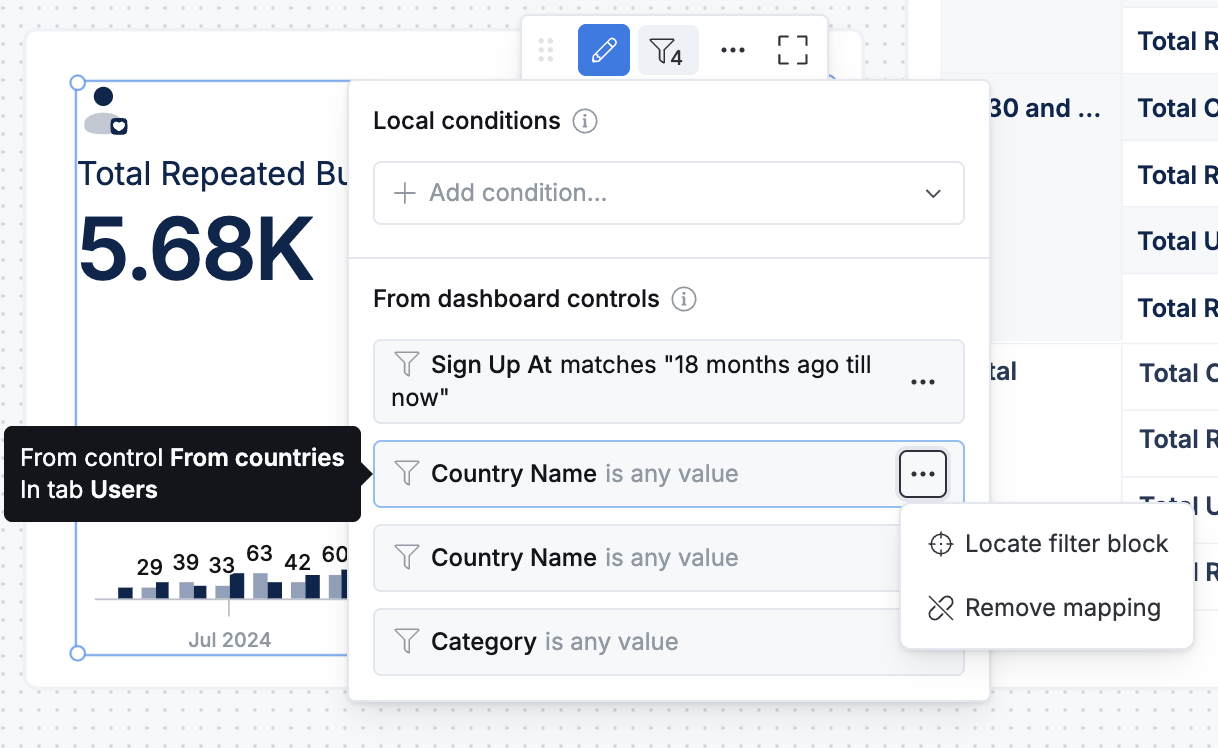
From visualization blocks
From the visualization block, you can click on the filter icon to see what filters are applied to this block, and you can remove the mapping as well.
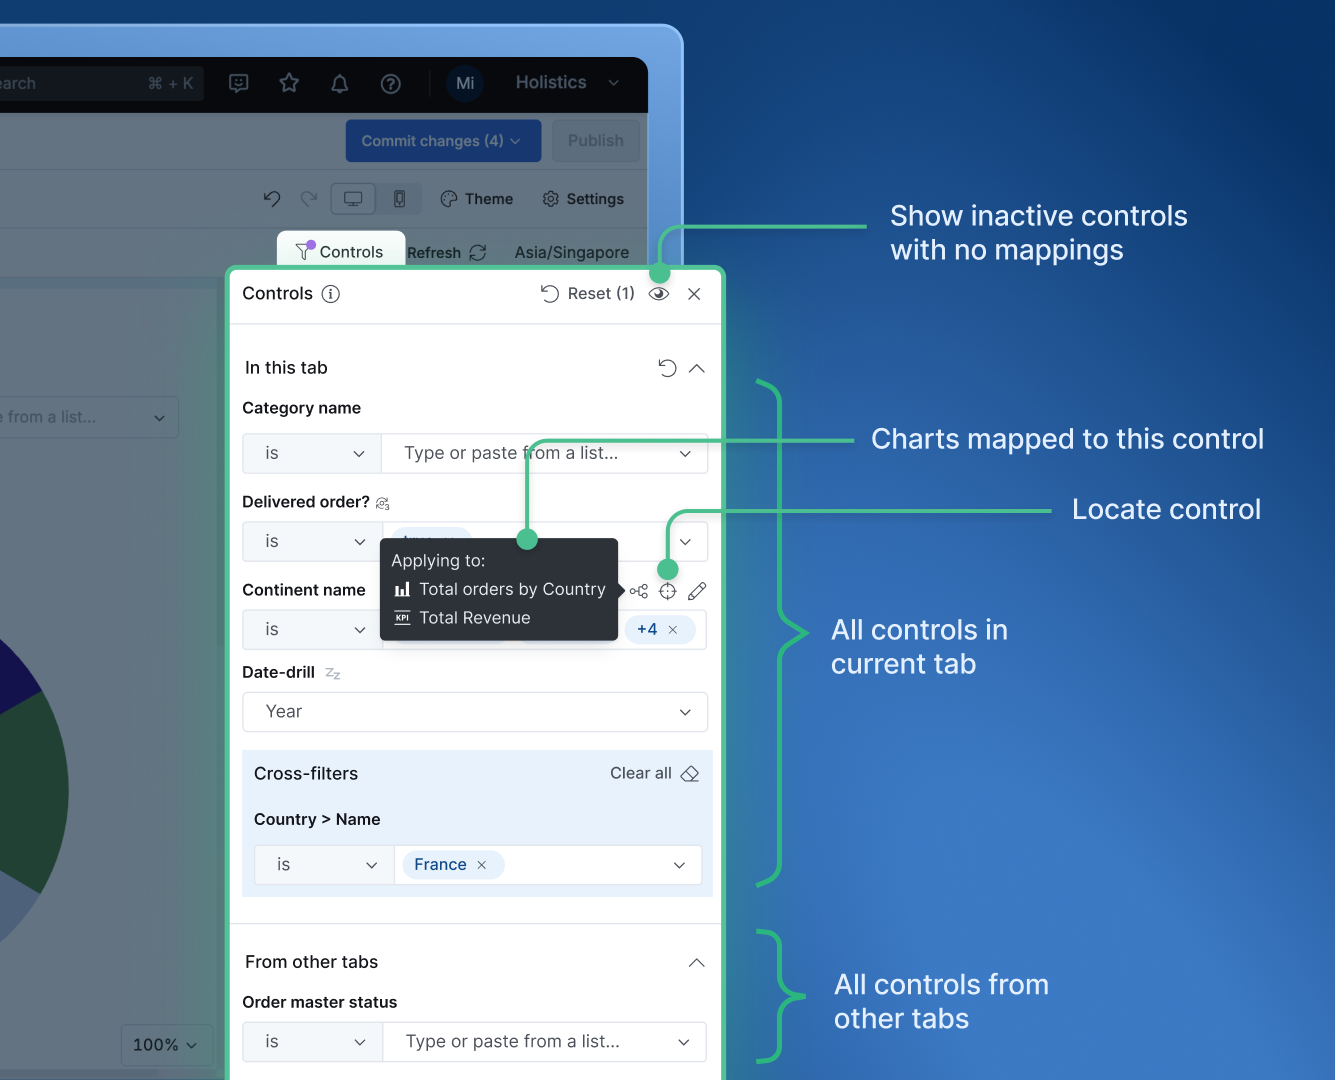
From controls & filters panel
This will show all the filters available in the dashboard. You can locate the filters, edit filters, or check the mappings quickly in this centralized place.
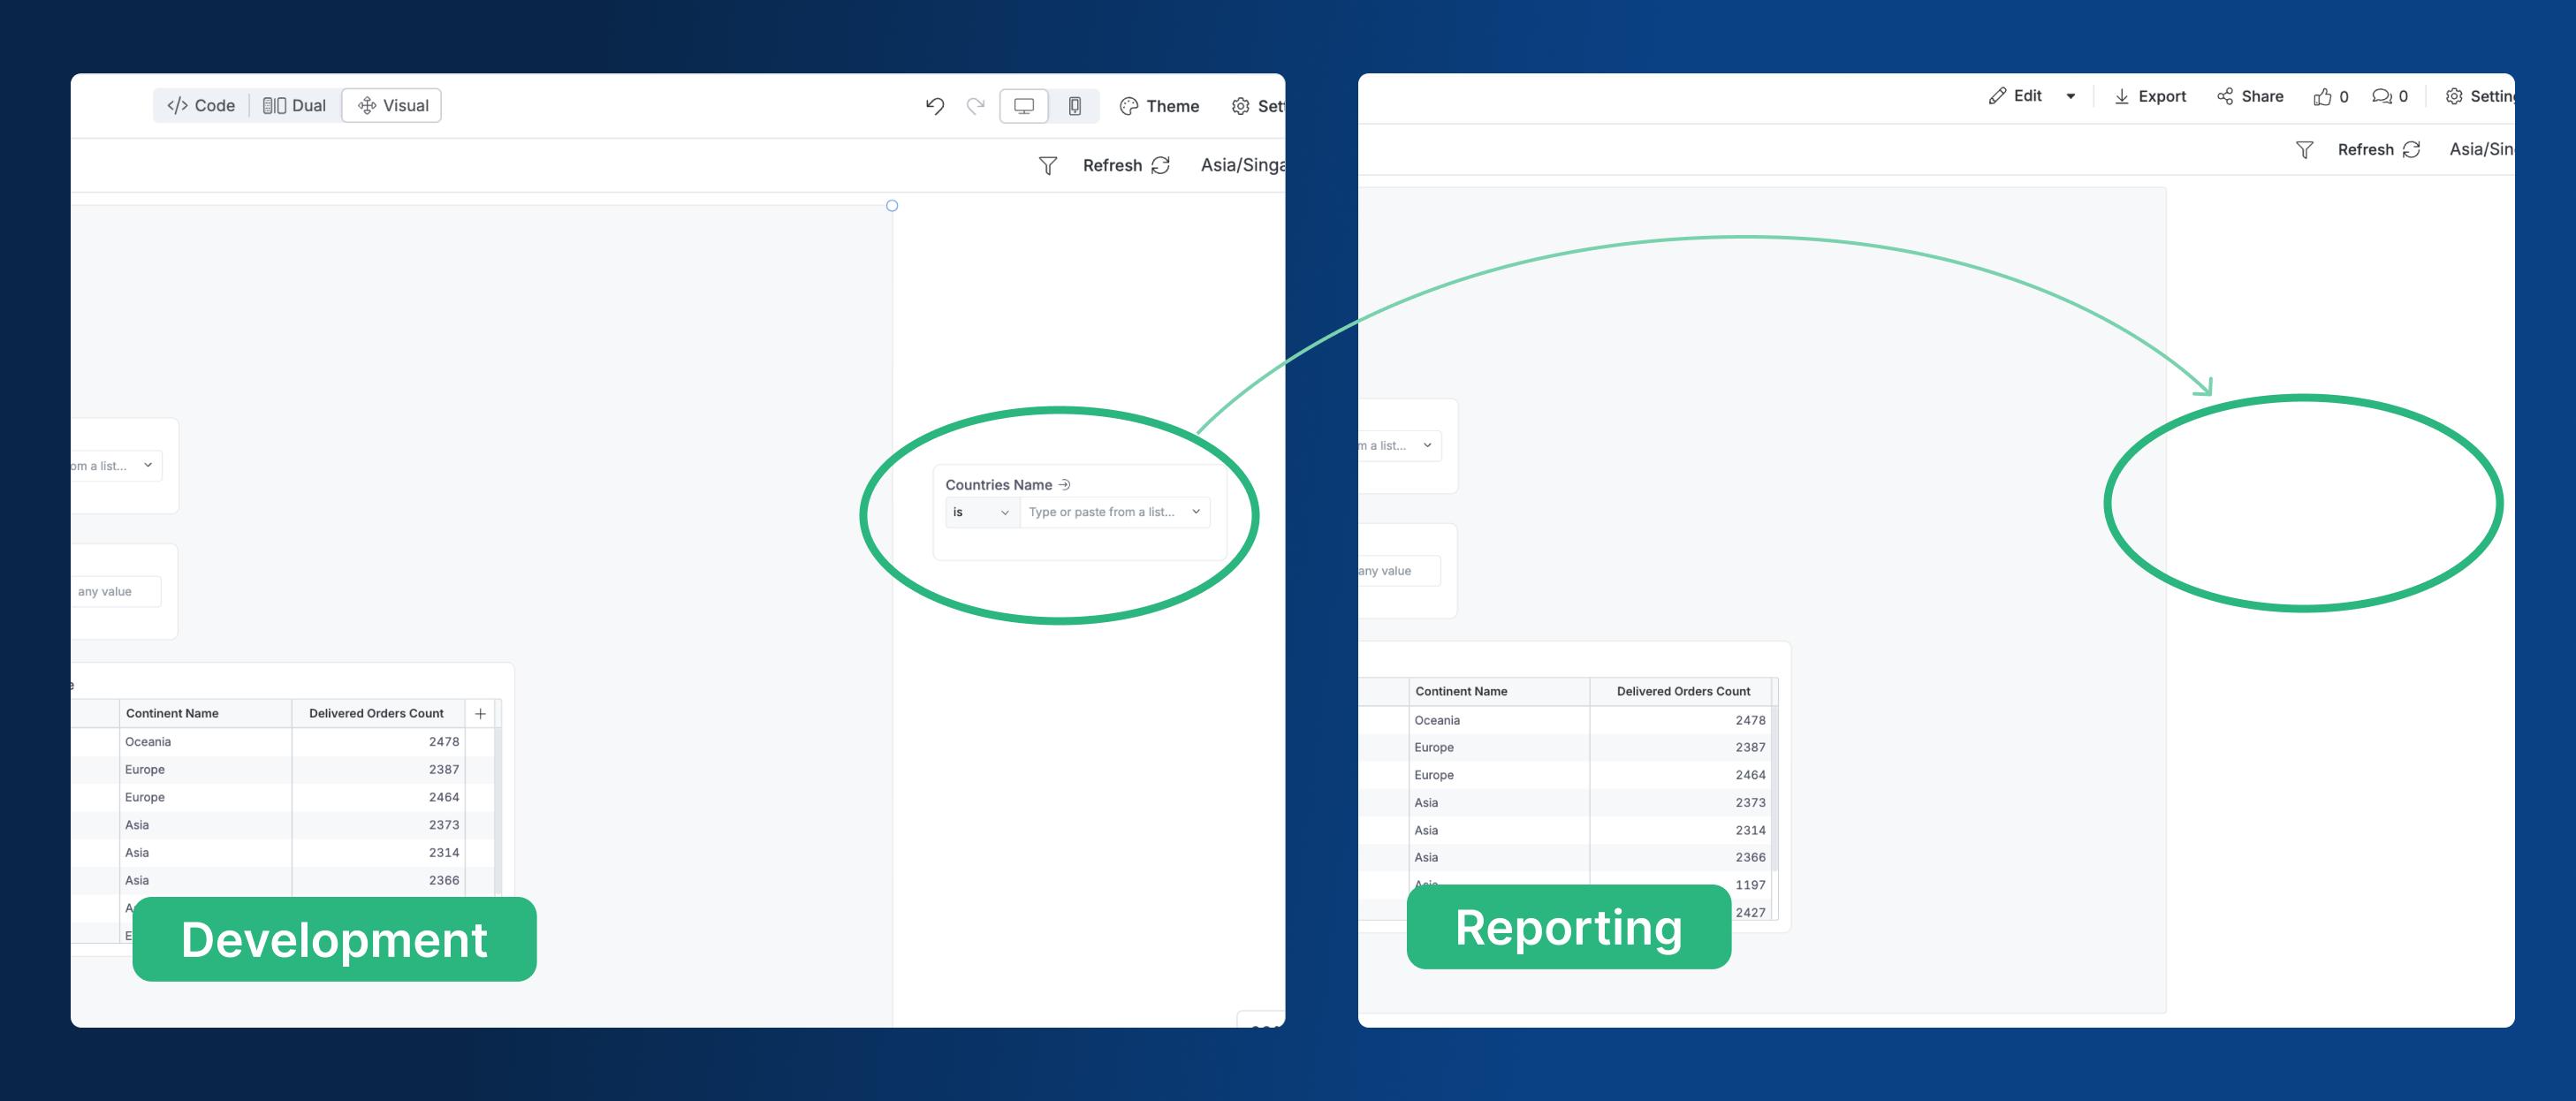
Hide filters
You can hide filters from dashboard viewers by dragging them outside the canvas area in Edit mode and saving the change. When viewers access the dashboard, these filters won't be visible.
Hiding filters/controls is a visual feature only and does not restrict data access. Viewers can bypass hidden filters by modifying URL parameters or by inspecting the page and revealing hidden filters. For data security, we recommend using Row-level Permission instead.
FAQs
Why doesn't the default filter value reapply after refreshing the browser page?
In Holistics, modifying and submitting a filter creates a URL parameter called "fstate". This is intended for saving or sharing your dashboard with the chosen filter values.
Refreshing the page won't reset the filter to its default value. To revert to default filter values, you can either go back a page in your browser or delete the "fstate" URL parameter.