Getting Started with Dynamic Content Blocks
This tutorial walks you through creating your first Dynamic Content Block. By the end, you'll understand the basic workflow and be ready to build more complex templates.
Prerequisites
- A Canvas Dashboard where you want to add the block
- A dataset with the fields you want to display
Step-by-Step Tutorial
Step 1: Add a Visualization Block
Start by adding a new Visualization block to your Canvas Dashboard, just like you would add any other chart.
Step 2: Choose Markdown Visualization Type
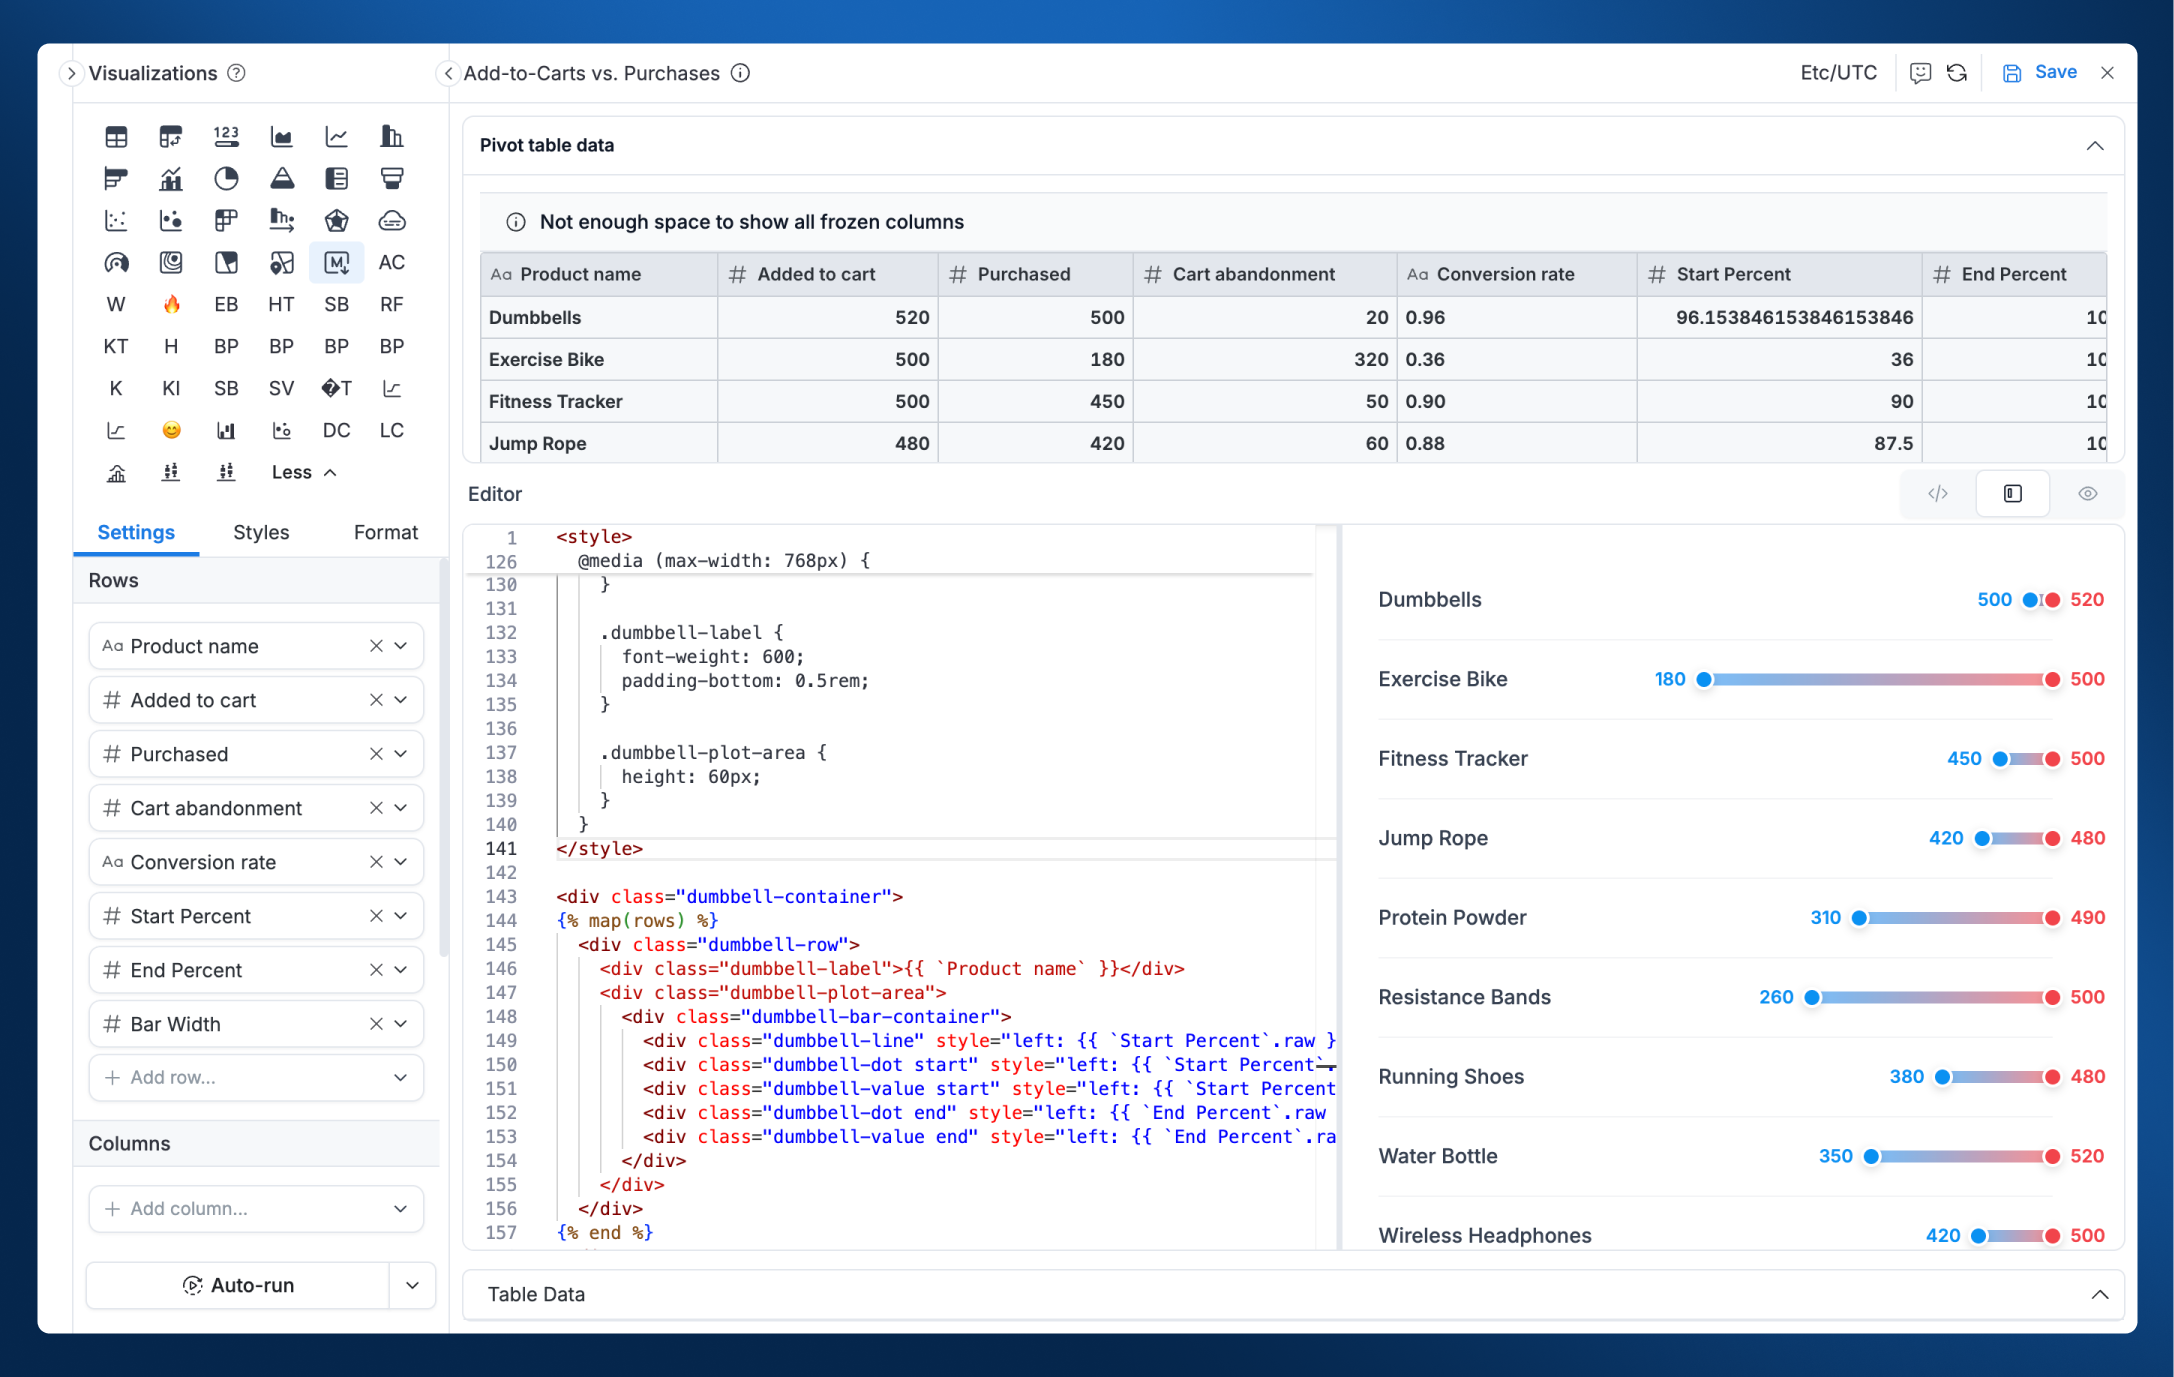
In the visualization type selector, choose Markdown as your chart type. This enables the Dynamic Content Block editor with two tabs:
- Chart Data: Preview your data
- Editor: Write your template
Step 3: Add Your Data Fields
Drag and drop the data fields you want to use in your template, just like building a Table or Pivot Table:
- Add dimensions (e.g., Product Name, Customer Name, Date)
- Add measures (e.g., Revenue, Order Count, Conversion Rate)
- Apply filters and sorting as needed
Use the Chart Data tab to preview your data and ensure it contains the information you need.
Step 4: Build Your Template
Switch to the Editor tab to start building your template. You can use:
- HTML: For complete control over structure and styling
- Markdown: For simpler, text-based formatting
- Mix both: Combine HTML and Markdown as needed
Step 5: Inject Your Data
Use template syntax to inject your data into the content. Here's a simple example:
<div style="padding: 1rem; background: #f9fafb; border-radius: 8px;">
  <h3>{{ rows[0].`Product Name` }}</h3>
  <p>Revenue: {{ rows[0].`Revenue` }}</p>
</div>
The editor provides real-time preview so you can see how your template renders with actual data.
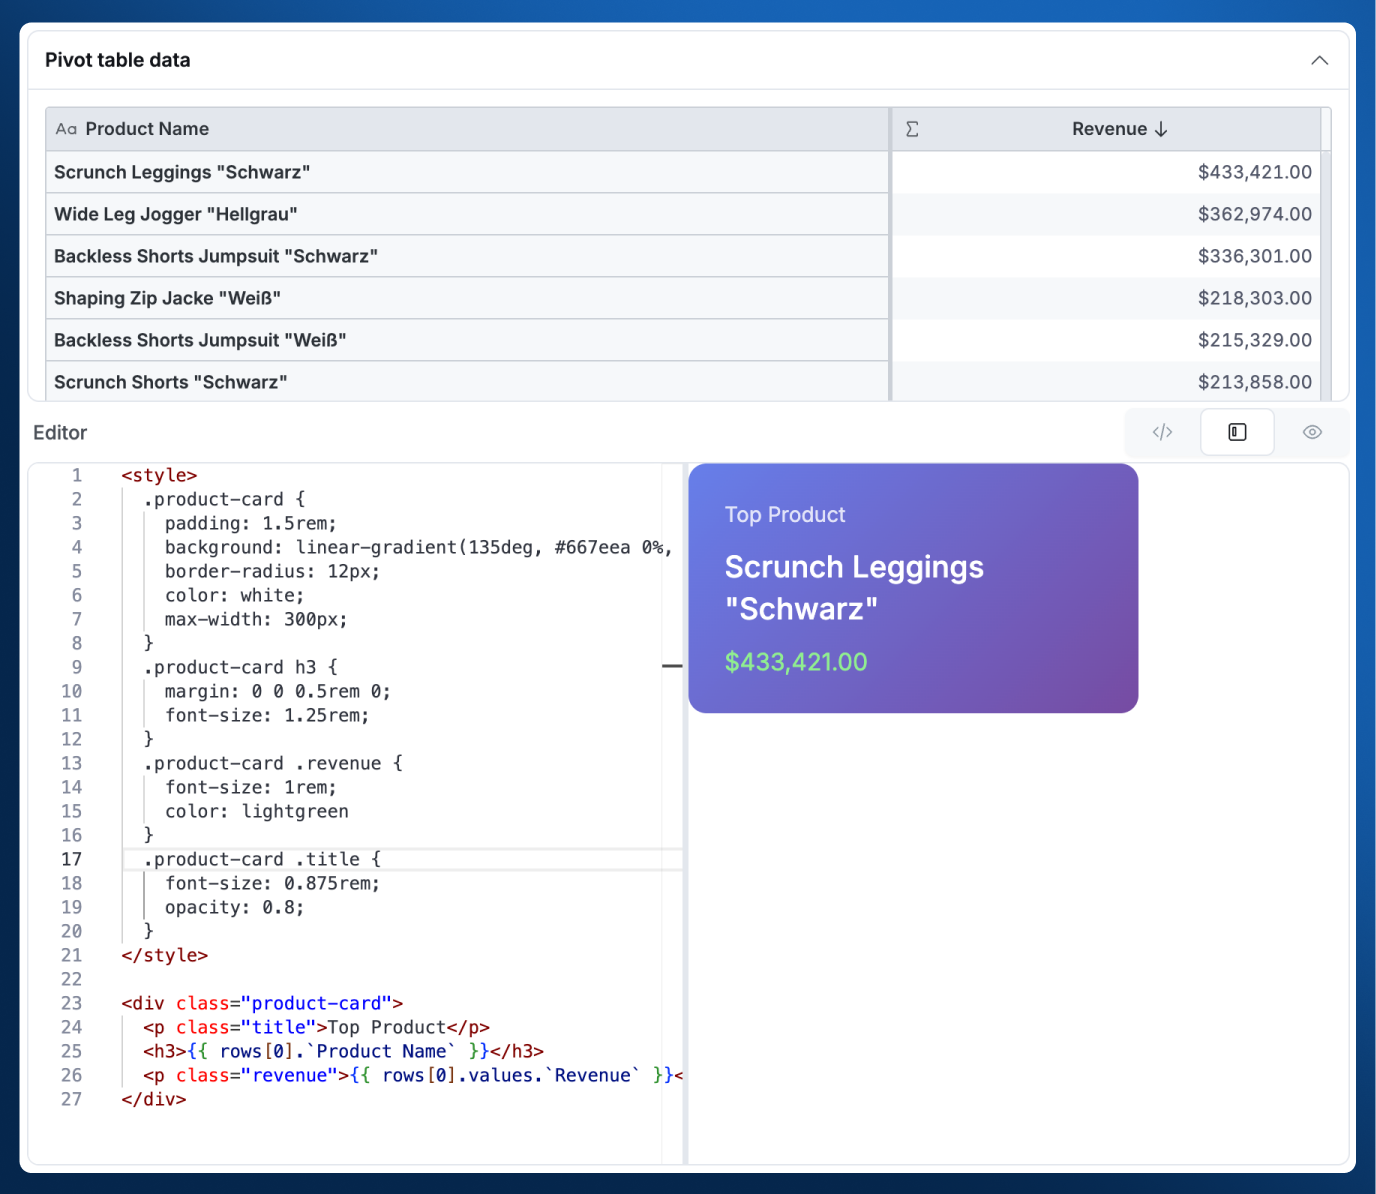
Your First Template
Let's create a simple "Top Product" card. Assuming you have fields Product Name and Revenue:
<style>
  .product-card {
    padding: 1.5rem;
    background: linear-gradient(135deg, #667eea 0%, #764ba2 100%);
    border-radius: 12px;
    color: white;
    max-width: 300px;
  }
  .product-card h3 {
    margin: 0 0 0.5rem 0;
    font-size: 1.25rem;
  }
  .product-card .revenue {
    font-size: 1rem;
    color: lightgreen
  }
  .product-card .title {
    font-size: 0.875rem;
    opacity: 0.8;
  }
</style>

<div class="product-card">
  <p class="title">Top Product</p>
  <h3>{{ rows[0].`Product Name` }}</h3>
  <p class="revenue">{{ rows[0].values.`Revenue` }}</p>
</div>
Next Steps
Now that you've created your first Dynamic Content Block:
- Syntax Reference: Learn all the template syntax options, including loops, raw values, and conditional styling
- Template Gallery: Browse ready-to-use examples for inspiration