Connect to Azure MS SQL
Azure MS SQL Database is an intelligent, scalable, and relational database service built for the cloud.
This page describes how to connect your Azure MS SQL database to Holistics as a data source.
High-level overview
There are 3 main steps to get started using Azure MS SQL database with Holistics:
- Allow Holistics’IP addresses by creating firewall rules in your Azure database settings.
- Create a dedicated database user and Grant privileges
Read&Write. - Connect Azure MS SQL database to Holistics as a data source.
Step-by-step instructions
Step 1: Allow Holistics’IP address
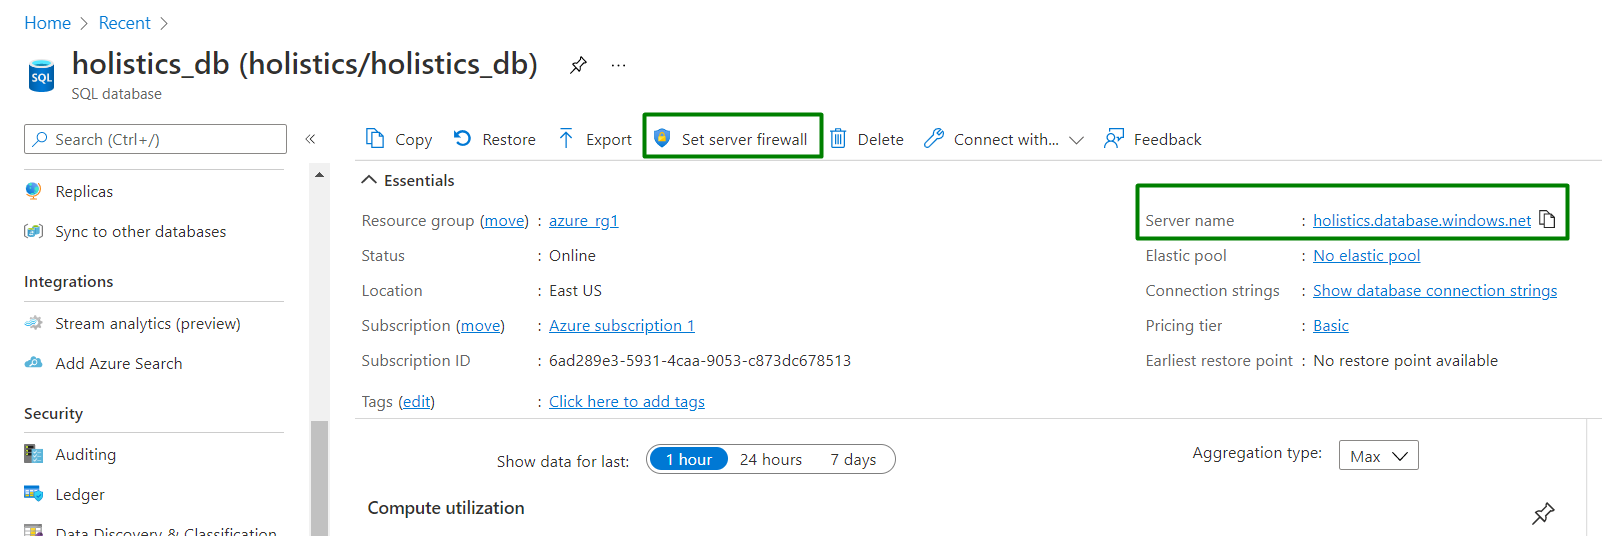
- Access your Azure MS SQL instance.
- Select SQL Databases from the navigation, then select the name of the database you’d like to connect to.
- Go to the Overview page for your database and click Set server firewall near the top of the page to open Firewall settings page.
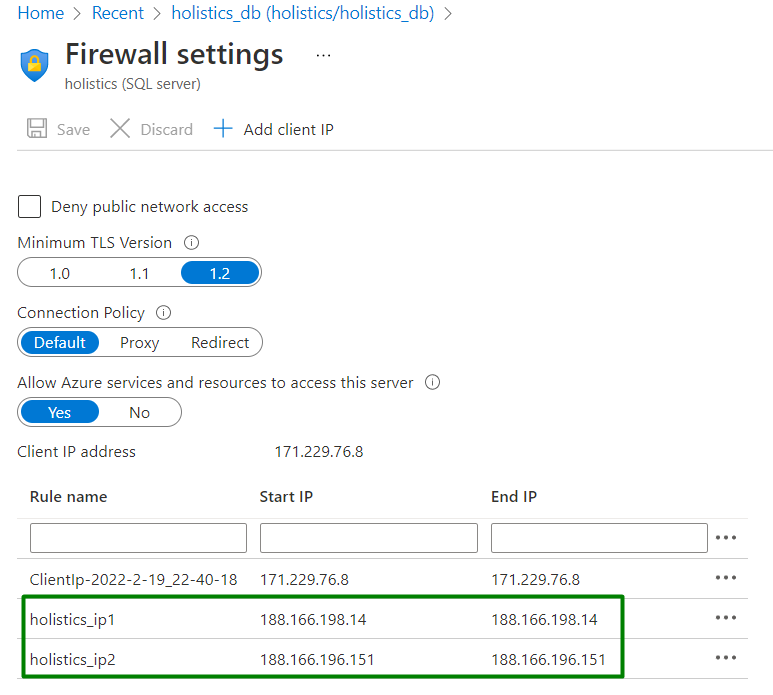
We then chose TLS 1.2 and added firewall rule
- Specify the Rule name
- Specify Holistics’s IP addresses in the Start IP and End IP fields as per your region (the IP addresses are also listed in the Data Source Connection Form)
For example, if you’re in APAC, you need to add 2 new rules using the following IP address:
| Rule name | Start IP | End IP |
|---|---|---|
| Holistics_1 | 188.166.196.151 | 188.166.196.151 |
| Holistics_2 | 188.166.196.14 | 188.166.196.14 |
Step 2: Create a dedicated DB user
2.1. Create a database user (optional)
To create this user, you’ll need to connect to your MS Azure database in SQL Server Management Studio, see this guide for more information.
Once connected, enter the following commands:
USE [<database>]; # <database> is the database name
CREATE USER holistics WITH PASSWORD = '<password>';
This creates a contained database user who grants access to the database user on an individual database level instead of the master database level.
2.2. Grant privileges to the user
The database user specified in the Holistics must have the traditional database-level roles like db_datareader, db_datawriter. To assign these privileges, enter these commands:
EXEC sp_addrolemember 'db_datareader', 'holistics';
EXEC sp_addrolemember 'db_datawriter', 'holistics';
Otherwise, if you only want to grant schema-level permission to the user, you could choose to transfer the ownership of a dedicated schema to the user holistic or create a new schema owned by the Holistics user.
--transfer the ownership of a dedicated schema to user holistic
ALTER AUTHORIZATION ON SCHEMA::[<schema_name>] TO holistics;
--create a new schema owned by the Holistics user
CREATE SCHEMA holistic_data AUTHORIZATION holistics;
Step 3: Connect Microsoft Azure to Holistics
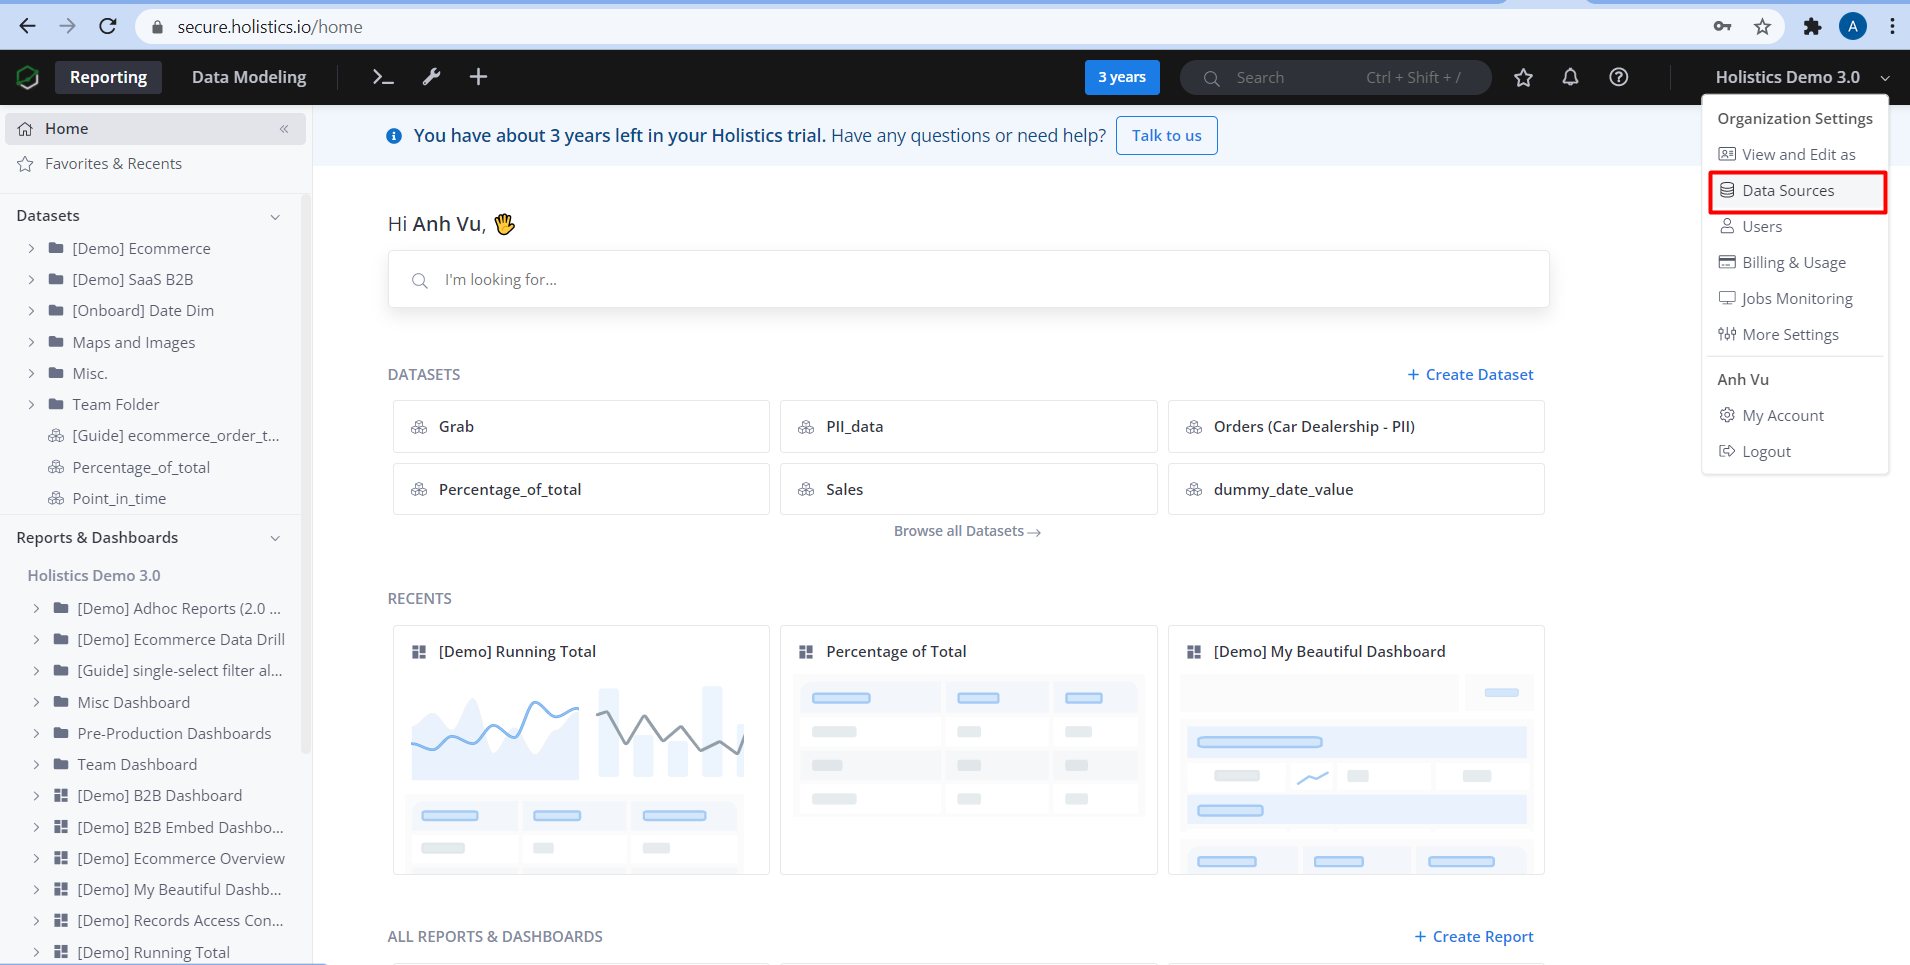
- From Holistics app's header bar, open Organization Settings menu -> Data Sources.
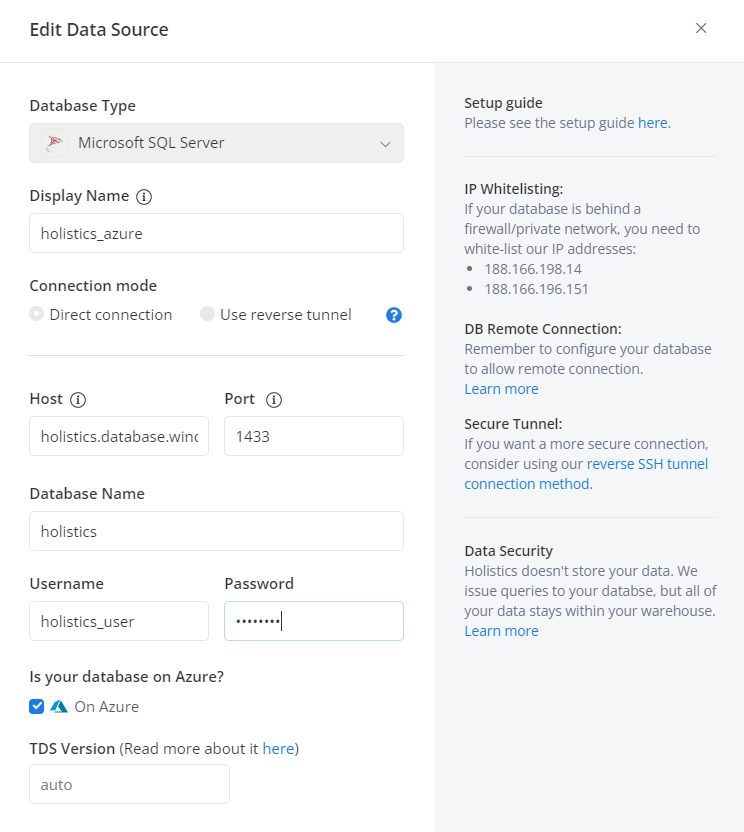
- Click New Data Source button, and select Microsoft SQL Server as the database type. Then fill in the form:
- Display Name - Give the connection a name.
- Connection Mode - Direct connection.
- Host - The Azure MS SQL server name, you can get the name on the Overview page of your Azure server in the Portal. See the screenshot in Step 1.
- Port - The default port number is 1433.
- Database Name - The database that you wish to replicate.
- Username - user name for dedicated Holistics user.
- Password - password for dedicated Holistics user.
- Also need to tick the On Azure option